

Up to 52% of users who walk away from using an app within the first 90 days do so due to poor customer onboarding. The signup flow is a critical part of the onboarding flow. 20-30% of signup attempts fail on mobile due to incomplete authentication, often using legacy options – an SMS is delayed or not delivered at all, an email ends up in the spam folder or is undelivered.
This problem is where the tru.ID PhoneCheck API comes in. It confirms the ownership of a mobile phone number by verifying the possession of an active SIM card with the same number.
A mobile data session gets created to a unique check URL for this verification. tru.ID then resolves a match between the verification of a phone number and the phone number that the mobile network operator (MNO) identifies as the owner of the mobile data session.
If you want to dive into the finished code, you can find it on GitHub.
Before you begin
To follow along with this tutorial, you'll need:
- A tru.ID Account
- A mobile phone with an active data SIM card
Getting started
In your terminal, clone the starter-files branch with the following command:
git clone -b starter-files https://github.com/tru-ID/passwordless-auth-flutter.git
npm install -g @tru_id/cli
tru login <YOUR_IDENTITY_PROVIDER> (this is one of google, github, or microsoft) using the Identity Provider you used when signing up. This command will open a new browser window and ask you to confirm your login. A successful login will show something similar to the below:Success. Tokens were written to /Users/user/.config/@tru_id/cli/config.json. You can now close the browser
config.json file contains some information you won't need to modify. This config file includes your Workspace Data Residency (EU, IN, US), your Workspace ID, and token information such as your scope.Create a new tru.ID project within the root directory with the following command:tru projects:create passwordless-auth-flutter --project-dir .
passwordless-auth-flutter directory and run the following command to clone the dev-server:git clone git@github.com:tru-ID/dev-server.git
dev-server directory, run the following command to create a.env copy of .env.example:cp .env.example .env
.env file, update the values of TRU_ID_CLIENT_ID andTRU_ID_CLIENT_SECRET with your client_id and client_secret in yourtru.json file.dev-server to the Internet for your mobile application to access your backend server. For this tutorial, we're using ngrok, which we've included in the dev-server functionality. So to start with, uncomment the following and populate them with your ngrok credentials:NGROK_ENABLED=true#NGROK_SUBDOMAIN=a-subdomain # Uncommenting this is optional. It is only available if you have a paid ngrok account.NGROK_AUTHTOKEN=<YOUR_NGROK_AUTHTOKEN> # This is found in the ngrok dashboard: https://dashboard.ngrok.com/get-started/your-authtokenNGROK_REGION=eu # This is where your ngrok URL will be hosted. If you're using tru.ID's `eu` data residency; leave it as is. Otherwise, you could specify `in` or `us`.
dev-server directory, run the following two commands:npm install # Installs all third-party dependencies in package.jsonnpm run dev # Starts the server
To start the project, ensure you have a physical device connected, run the following commands to install all of the application's dependencies, and then run the application on your device:
flutter pub get$ flutter run
Note To run this application on an iOS device, please ensure you've provisioned your project in XCode.
The example onboarding flow is shown in the three images below:
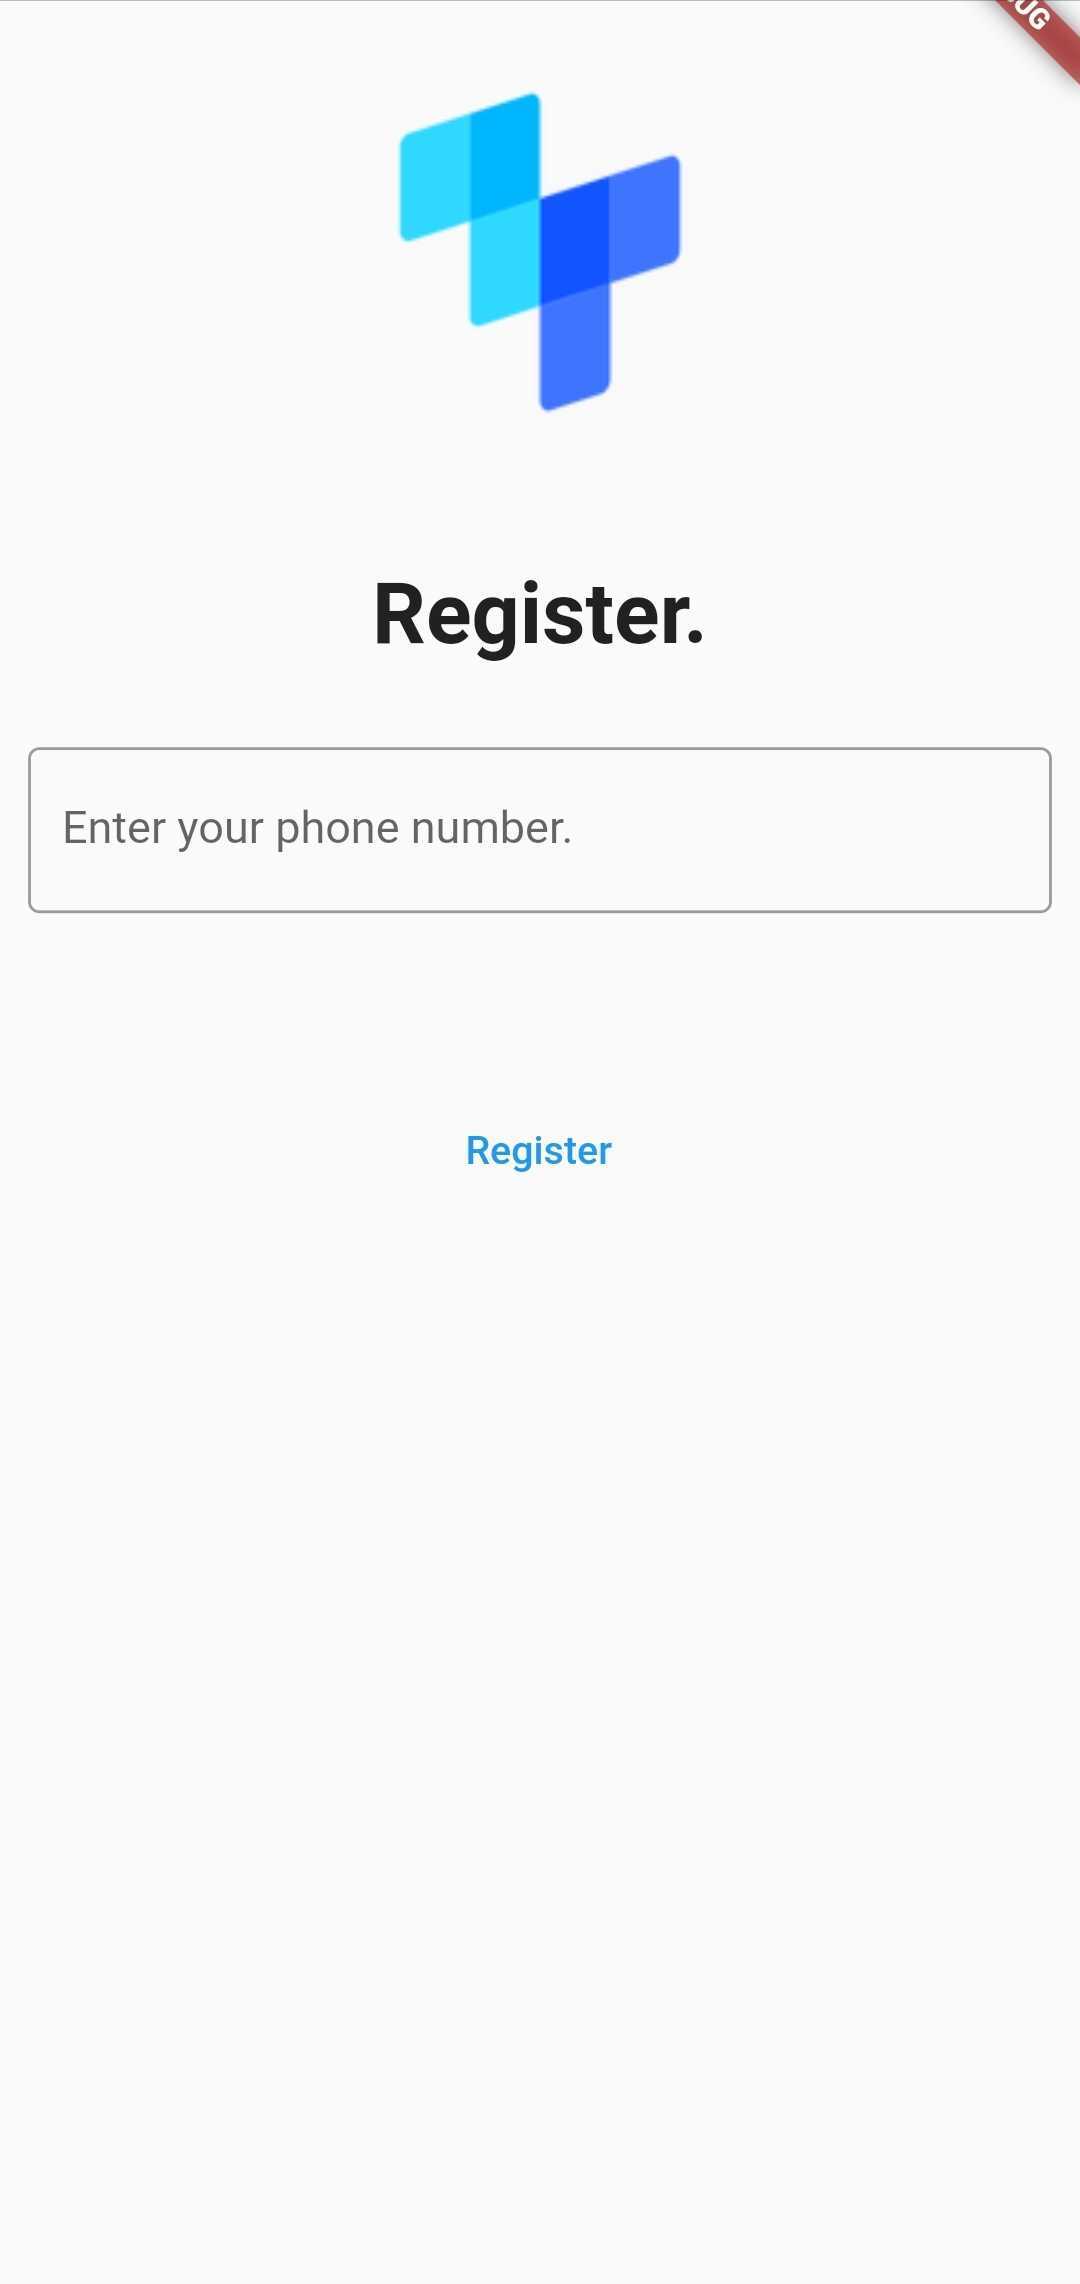
Get the user's phone number
The first step is to get the user's phone number. Before this happens, update the baseURL value in lib/registration.dart to the value of the ngrok URL you noted earlier in the tutorial.
final String baseURL = 'https://{subdomain}.{region}.ngrok. io';
Next, you need to add pieces of state to store the phone number and a piece of state, loading, which helps trigger a visual cue that something (an HTTP request) is happening.
Find the line class _RegistrationState extends State<Registration>, and below this line, add the following two to define phoneNumber and loading as variables:
String? phoneNumber;bool loading = false;
The application must update the phoneNumber variable when the user has entered or altered theirs. So find the line: onChanged: (text) {}, and update it to the following example:
onChanged: (text) {setState(() {phoneNumber = text;});},
A visual indicator is needed to disable the button and display a loading image when the registration has been submitted. Near the bottom find the line: onPressed: () async {}, child: const Text('Register')), and update it as follows:
child: TextButton(onPressed: () async {},child: loading? const CircularProgressIndicator(): const Text('Register'),),
Here, if loading is true, a CircularProgressIndicator widget acts as the visual cue.
Create reusable functions
You now need to create reusable functions for handling two possible outcomes.
The first possible outcome is an errorHandler function, which takes in the current BuildContext, title and content and returns an AlertDialog widget.
The second possible outcome is the successHandler function which returns a generic AlertDialog.
Above class _RegistrationState extends State<Registration>, add the following snippet of code which contains the two functions for these possible outcomes:
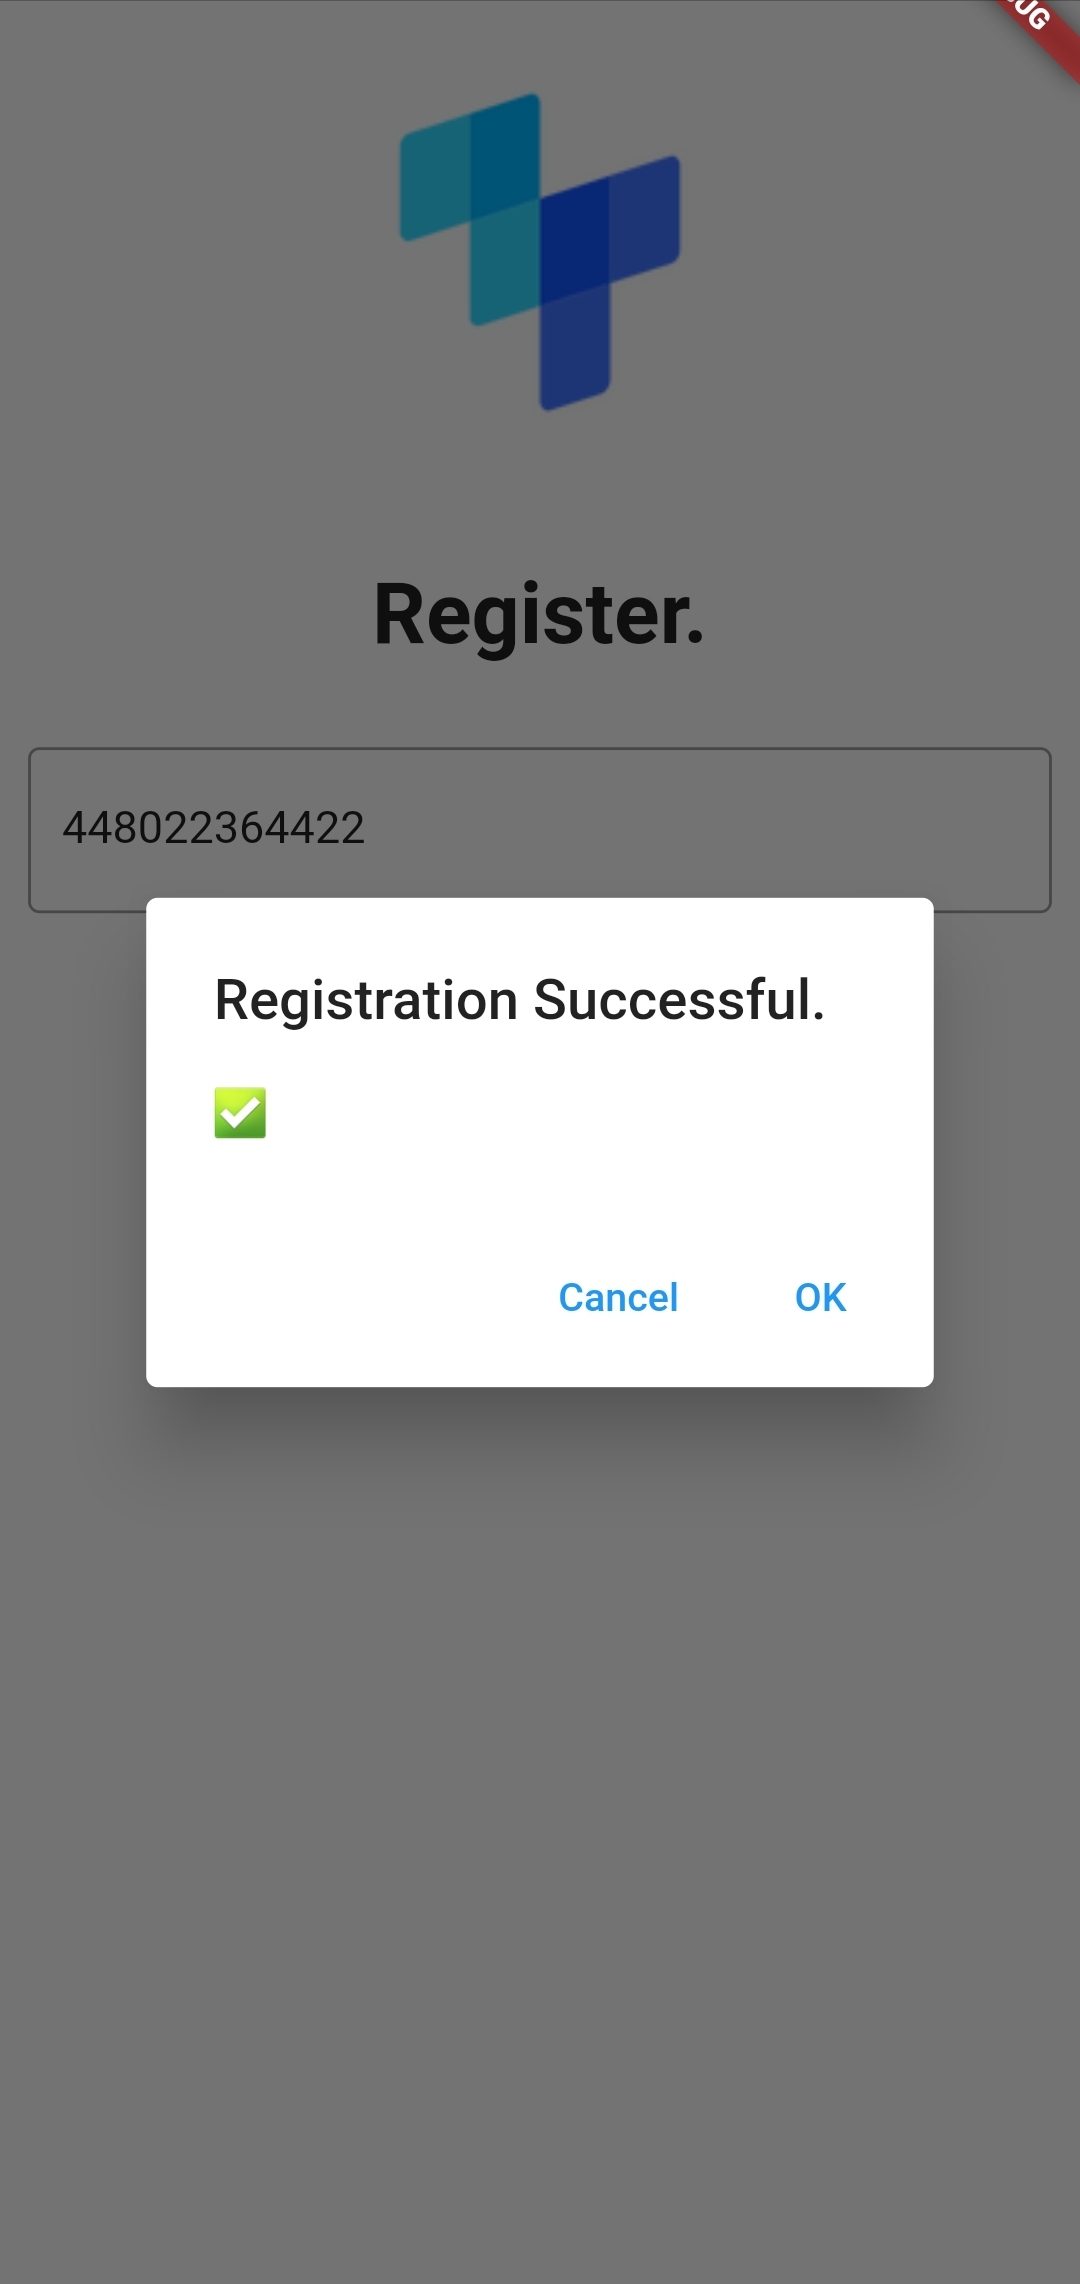
Future<void> errorHandler(BuildContext context, String title, String content) {return showDialog(context: context,builder: (BuildContext context) {return AlertDialog(title: Text(title),content: Text(content),actions: <Widget>[TextButton(onPressed: () => Navigator.pop(context, 'Cancel'),child: const Text('Cancel'),),TextButton(onPressed: () => Navigator.pop(context, 'OK'),child: const Text('OK'),),],);});}Future<void> successHandler(BuildContext context) {return showDialog(context: context,builder: (BuildContext context) {return AlertDialog(title: const Text('Registration Successful.'),content: const Text('✅'),actions: <Widget>[TextButton(onPressed: () => Navigator.pop(context, 'Cancel'),child: const Text('Cancel'),),TextButton(onPressed: () => Navigator.pop(context, 'OK'),child: const Text('OK'),),],);});}
Create the PhoneCheck
This next section makes a request to the reachability API, making sure the user's mobile network operator supports the PhoneCheck API. If so, it makes a PhoneCheck request. The tru.ID Flutter SDK contains all the functionality to provide this experience. Install this SDK in the terminal with the following command:
flutter pub add tru_sdk_flutter#or$ dart pub add tru_sdk_flutter
Add the import tru.ID SDK and dart's convert library to the top of lib/registration.dart:
import 'package:tru_sdk_flutter/tru_sdk_flutter.dart';import 'dart:convert';
In the same piece of code you've recently updated (the TextButton component), find the line: onPressed: () async {}, and replace it with the following:
setState(() {loading = true;});TruSdkFlutter sdk = TruSdkFlutter();Map<Object?, Object?> reach = await sdk.openWithDataCellular("https://eu.api.tru.id/public/coverage/v0.1/device_ip",false);print("isReachable = $reach");bool isPhoneCheckSupported = false;if (reach.containsKey("http_status") &&reach["http_status"] != 200) {if (reach["http_status"] == 400 ||reach["http_status"] == 412) {return errorHandler(context, "Something Went Wrong.","Mobile Operator not supported, or not a Mobile IP.");}} else if (reach.containsKey("http_status") ||reach["http_status"] == 200) {Map body =reach["response_body"] as Map<dynamic, dynamic>;Coverage coverage = Coverage.fromJson(body);for (var product in coverage.products!) {if (product.name == "Phone Check") {isPhoneCheckSupported = true;}}} else {isPhoneCheckSupported = true;}if (!isPhoneCheckSupported) {return errorHandler(context, "Something went wrong.","PhoneCheck is not supported on MNO.");}
In the code sample above, the Reachability API gets called. This API request returns the networkId, networkName, countryCode, and products. The products array is an optional array supported by the MNO. There is also an error object which contains any potential errors.
Next, the application creates the variable isPhoneCheckSupported. If the error status is not a 412, the application loops through the products and checks whether the productName equals Phone Check; if it does, then isPhoneCheckSupported is set to true.
If the isPhoneCheckSupported variable gets set to false by the end of the loop, the PhoneCheck is not supported. In this situation, errorHandler function is called. If isPhoneCheckSupported is true, the PhoneCheck can be created.
First, create a data class representing expected properties and convert the JSON response to a Dart Map.
Create a new file called models.dart in the lib directory and paste the following:
class PhoneCheck {final String id;final String url;PhoneCheck({required this.id, required this.url});factory PhoneCheck.fromJson(Map<dynamic, dynamic> json) {return PhoneCheck(id: json['check_id'],url: json['check_url'],);}}
The code you've just written creates a PhoneCheck class with two fields, the checkId and checkUrl, which represent the check_id and check_url values retrieved from the PhoneCheck API response.
A factory constructor is also created, which initializes final variables from a JSON object passed in.
It's time to create a function that takes in a JSON string and passes the decoded JSON object to the factory constructor. At the top of lib/registration.dart, add the import for your newly created models.dart:
import 'package:passwordless_auth_flutter/models.dart';
The next step is to create a function for creating the PhoneCheck resource. The HTTP package is needed to make HTTP network requests. In the terminal, run the following to install this package:
flutter pub add http#or$ dart pub add http
Import this new class at the top of lib.registration.dart:
import 'package:http/http.dart' as http;
Using this newly installed package, a function is needed to take the user's phone number and make a POST request to the endpoint /phone-check. If the status is 200 -Ok, then call the helper method from the PhoneCheck class to convert the JSON to an object. Otherwise, return null.
Above the line Future<void> errorHandler(BuildContext context, String title, String content) {, create the following new function, createPhoneCheck:
Future<PhoneCheck?> createPhoneCheck(String phoneNumber) async {final response = await http.post(Uri.parse('$baseURL/v0.2/phone-check'),body: {"phone_number": phoneNumber});if (response.statusCode != 200) {return null;}PhoneCheck phoneCheck = PhoneCheck.fromJson(jsonDecode(response.body));return phoneCheck;}
The next step is to call the errorHandler function if there is an error. For this, in the onPressed property of the TextButton() widget, add the following:
onPressed: () async {...if (!isPhoneCheckSupported) {return errorHandler(context, "Something went wrong.","PhoneCheck is not supported on MNO.");}final PhoneCheck? phoneCheckResponse =await createPhoneCheck(phoneNumber!);if (phoneCheckResponse == null) {setState(() {loading = false;});return errorHandler(context, 'Something went wrong.','Phone number not supported');}}
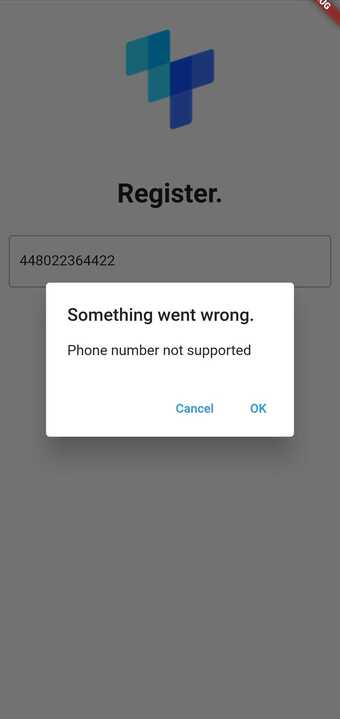
The image below is an example of what the user is presented with if the mobile network operator does not support their phone number.
Open the Check URL
When a PhoneCheck gets created, the response contains a check URL, which the application needs to make a GET request over cellular for the check to be successful. The tru.ID Flutter SDK uses native functionality to force the network request through a cellular connection rather than WiFi. To make this request in the onPressed function within the TextButton widget, add the following code as shown below:
onPressed: () async {...Map result =await sdk.openWithDataCellular(phoneCheckResponse.url, false);print("openWithDataCellular Results -> $result");if (result.containsKey("error")) {setState(() {loading = false;});errorHandler(context, "Something went wrong.","Failed to open Check URL.");}}
The code above first opens the check URL; it then checks whether a result was received, which will indicate whether the check was successful or not.
Complete the PhoneCheck
This section covers completing the PhoneCheck flow and handling the result. To first complete the flow, you'll need to receive the check_id and code found in the final redirect when opening the check URL. These pieces of information need to be included in a PATCH request to tru.ID's API's, via your backend server. So, using the dev-server's /v0.2/phone-check/exchange-code endpoint.
First, a new data class is required to represent the properties expected in the PhoneCheck response.
At the bottom of lib/models.dart, add the following PhoneCheckResult class containing three new fields, id and match:
class PhoneCheckResult {final String id;bool match = false;PhoneCheckResult({required this.id, required this.match});factory PhoneCheckResult.fromJson(Map<dynamic, dynamic> json) {return PhoneCheckResult(id: json['check_id'],match: json['match'] ?? false,);}}
Back in lib/login.dart, create a new function within your _RegistrationState class. This function will receive a checkID, code and optional referenceID. With these pieces of information it will make a JSON encoded POST request to your backend exchange-code endpoint, and if successful return the response of the PhoneCheck.
Future<PhoneCheckResult> exchangeCode(String checkID, String code, String? referenceID) async {var body = jsonEncode(<String, String>{'code': code,'check_id': checkID,'reference_id': (referenceID != null) ? referenceID : ""});final response = await http.post(Uri.parse('$baseURL/v0.2/phone-check/exchange-code'),body: body,headers: <String, String>{'content-type': 'application/json; charset=UTF-8',},);print("response request ${response.request}");if (response.statusCode == 200) {PhoneCheckResult exchangeCheckRes =PhoneCheckResult.fromJson(jsonDecode(response.body));print("Exchange Check Result $exchangeCheckRes");if (exchangeCheckRes.match) {print("✅ successful PhoneCheck match");} else {print("❌ failed PhoneCheck match");}return exchangeCheckRes;} else {throw Exception('Failed to exchange Code');}}
Within your login.dart file, locate the code you recently added, which opens the phoneCheckResponse.url. Below this block of code, add the following, which checks the HTTP status in the response is 200, it then proceeds to parse the data in the response and call exchangeCode to submit this information to your backend server.
The result for this POST request will contain information on the status of the PhoneCheck, whether the phone number matches the one associated with that SIM card.
if (result.containsKey("http_status") &&result["http_status"] == 200) {Map body = result["response_body"] as Map<dynamic, dynamic>;if (body["code"] != null) {CheckSuccessBody successBody =CheckSuccessBody.fromJson(body);try {PhoneCheckResult exchangeResult =await exchangeCode(successBody.checkId,successBody.code, successBody.referenceId);if (exchangeResult.match) {setState(() {loading = false;});return successHandler(context);} else {setState(() {loading = false;});return errorHandler(context, "Something went wrong.","Unable to login. Please try again later");}} catch (error) {setState(() {loading = false;});return errorHandler(context, "Something went wrong.","Unable to login. Please try again later");}}}
Here, you call the getPhoneCheck function, and if phoneCheckResult is null it calls the errorHandler. The application then checks whether the check has a match. If there is a match, call the successHandler function.
The image below shows an application example if there is a match in the PhoneCheck.
Wrapping up
That's it! With everything in place, you now have a seamless signup onboarding flow with minimal UX friction, resulting in reduced user drop-offs.

