

The tru.ID SIMCheck API indicates whether the SIM card associated with a mobile phone number was changed within the last seven days. This check provides an extra layer of security in your application authentication flows and can be used to detect attempted SIM swap fraud.
In this case, we'll use the tru.ID SIMCheck API to augment an app secured with Firebase Phone Auth.
If you want to dive into the code, you can find it on GitHub.
Before you begin
To follow along with this tutorial, you'll need:
- A tru.ID Account
- A mobile phone with a SIM card with a mobile data connection
- A Firebase Account
Get Started
In your terminal, clone the starter-files branch with the following command:
git clone -b starter-files https://github.com/tru-ID/firebase-phone-auth-sim-swap-detection-flutter.git
If you're only interested in the finished code in main, then run:
git clone -b main https://github.com/tru-ID/firebase-phone-auth-sim-swap-detection-flutter.git
npm install -g @tru_id/cli
tru login <YOUR_IDENTITY_PROVIDER> (this is one of google, github, or microsoft) using the Identity Provider you used when signing up. This command will open a new browser window and ask you to confirm your login. A successful login will show something similar to the below:Success. Tokens were written to /Users/user/.config/@tru_id/cli/config.json. You can now close the browser
config.json file contains some information you won't need to modify. This config file includes your Workspace Data Residency (EU, IN, US), your Workspace ID, and token information such as your scope.Create a new tru.ID project within the root directory with the following command:tru projects:create firebase-flutter --project-dir .
firebase-flutter directory and run the following command to clone the dev-server:git clone git@github.com:tru-ID/dev-server.git
dev-server directory, run the following command to create a.env copy of .env.example:cp .env.example .env
.env file, update the values of TRU_ID_CLIENT_ID andTRU_ID_CLIENT_SECRET with your client_id and client_secret in yourtru.json file.dev-server to the Internet for your mobile application to access your backend server. For this tutorial, we're using ngrok, which we've included in the dev-server functionality. So to start with, uncomment the following and populate them with your ngrok credentials:NGROK_ENABLED=true#NGROK_SUBDOMAIN=a-subdomain # Uncommenting this is optional. It is only available if you have a paid ngrok account.NGROK_AUTHTOKEN=<YOUR_NGROK_AUTHTOKEN> # This is found in the ngrok dashboard: https://dashboard.ngrok.com/get-started/your-authtokenNGROK_REGION=eu # This is where your ngrok URL will be hosted. If you're using tru.ID's `eu` data residency; leave it as is. Otherwise, you could specify `in` or `us`.
dev-server directory, run the following two commands:npm install # Installs all third-party dependencies in package.jsonnpm run dev # Starts the server
Getting started with FlutterFire
This project uses FlutterFire, a set of Flutter plugins connecting your Flutter application to Firebase. To get your project up and running check out the overview guide, how to get set up for Android, iOS, and the Authentication Setup.
Note Flutter with null safety is preferred.
Run the app
To start the project, ensure you have a physical device connected, then run:
flutter pub get$ flutter run
Note To run this application on an iOS device, please ensure you've provisioned your project in XCode.
On your physical device, you'll see an application open, which will look the same as what's shown in the example below:
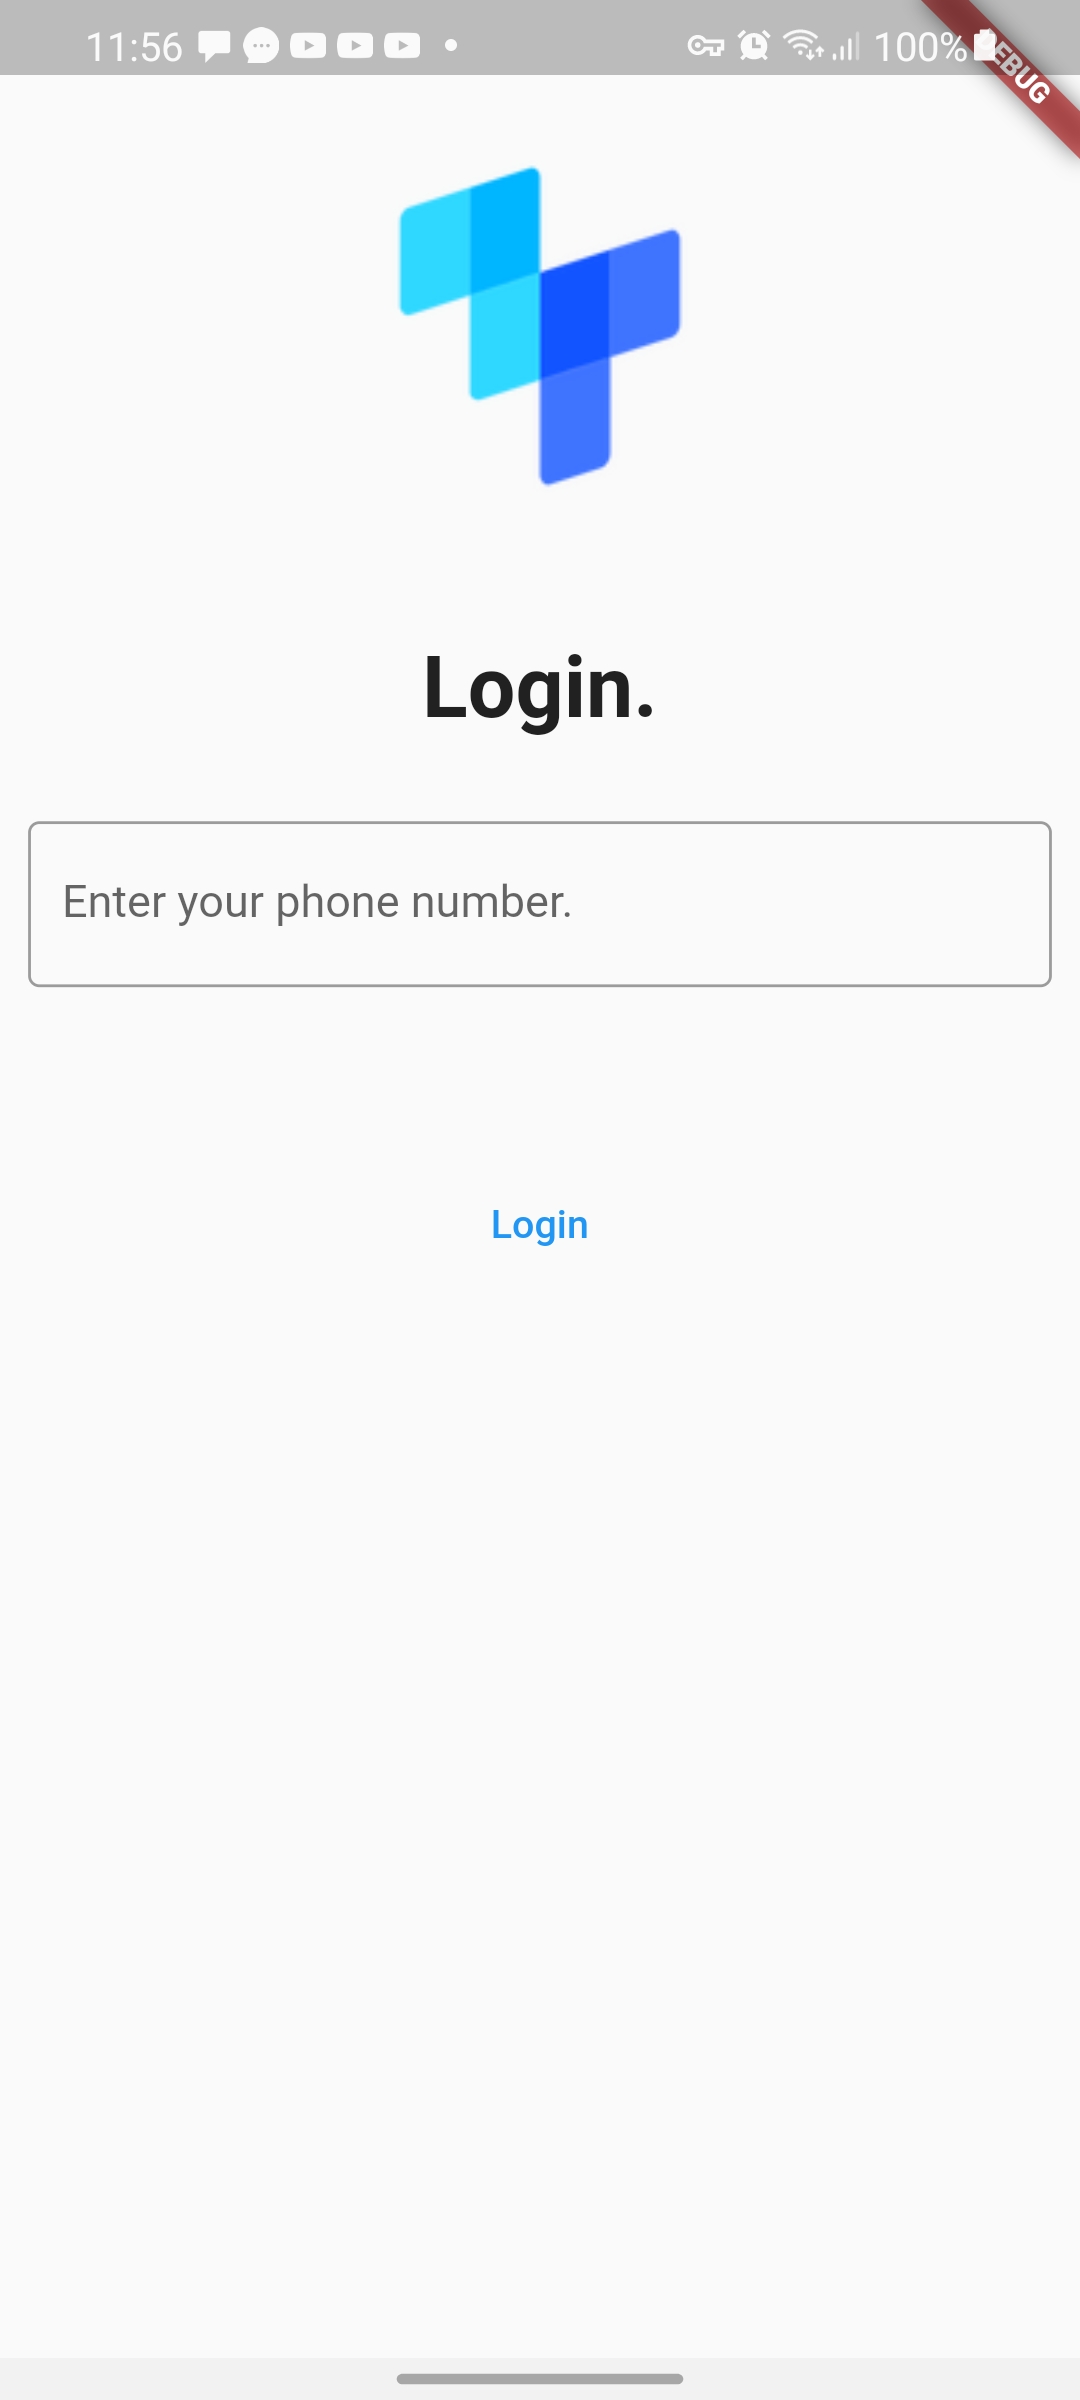
Get the user's phone number
Update the baseURL value in lib/registration.dart to the value of the ngrok URL you noted earlier in the tutorial. This URL tells your mobile application how to communicate with the backend server.
final String baseURL = '<YOUR-NGROK-URL>';
Next, you need to store the user's phone number when it is input. You'll need to add the pieces of state to store the phone number and SMS OTP. Flutter's TextEditingController is the perfect solution for this. Two booleans are also needed, which will be defaulted by false. These booleans are loading to trigger a visual cue and proceedWithFirebaseAuth to determine whether the SIM check was successful or not.
Locate the line class LoginState extends State<Login> {, and above the @override call, add the following:
final phoneNumber = TextEditingController();final otp = TextEditingController();String? phoneNumberValue;int? resendingToken;bool proceedWithFirebaseAuth = false;bool loading = false;void dispose() {phoneNumber.dispose();otp.dispose();super.dispose();}
Here you create the relevant states and override a dispose function, which disposes of the controllers once they're no longer needed, typically because the app has moved to a new route.
The next step is to bind the phone number controller to the TextField. Update the TextField widget in the widget tree to the following:
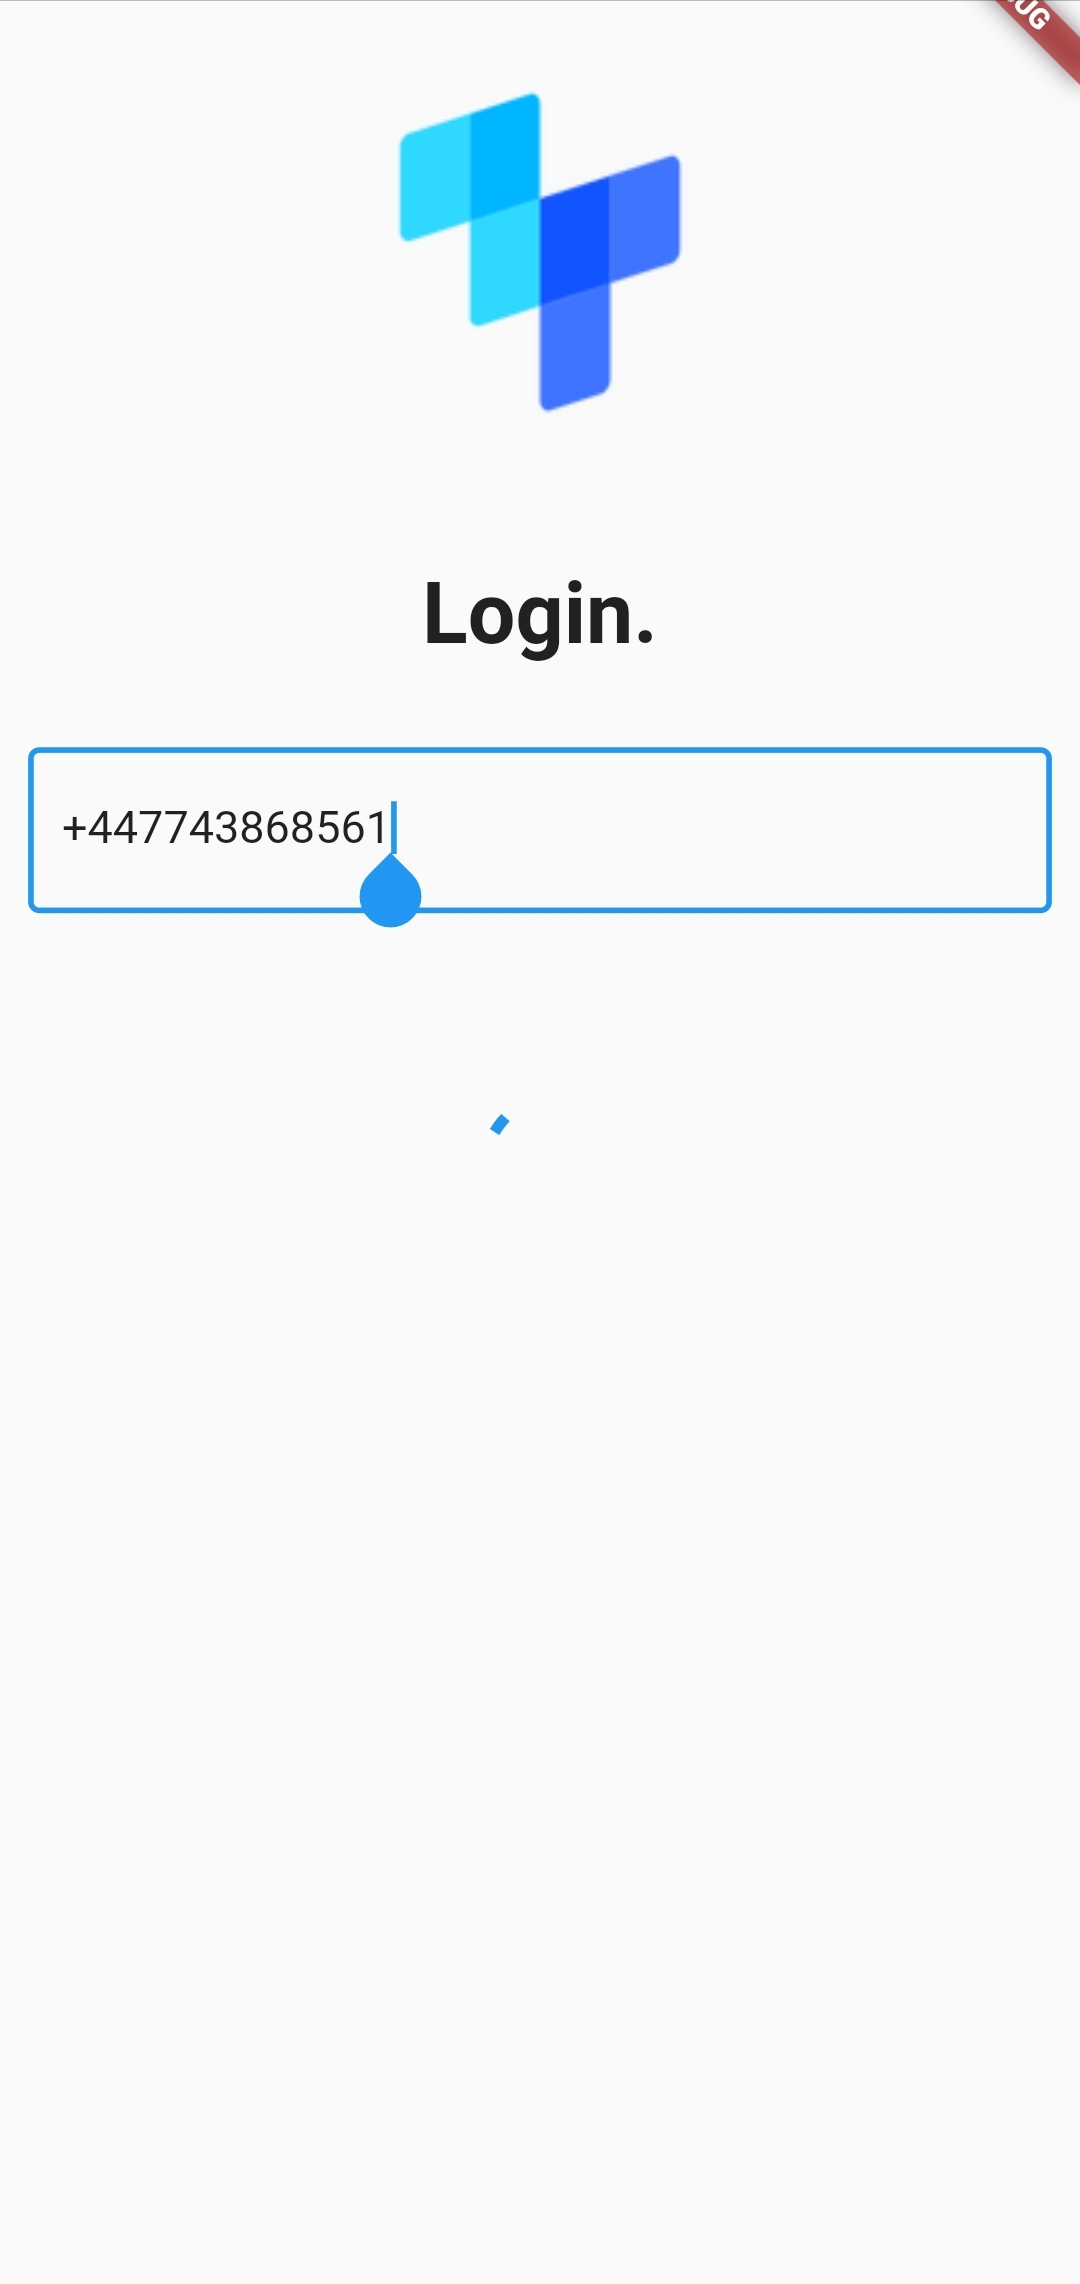
child: TextField(keyboardType: TextInputType.phone,controller: phoneNumber,decoration: const InputDecoration(border: OutlineInputBorder(),hintText: 'Enter your phone number.',),)),
Lastly, set up the visual indicator to display when something is happening. Replace the child prop of the TextButton widget with the following:
child: loading? const CircularProgressIndicator(): const Text('Login')),
If loading is true in the above code, the CircularProgressIndicator widget gets displayed, which acts as the visual cue to the user.
You also need to create a reusable function to handle successful authentication to keep code from being repeated (see the DRY principle). For this, above class _LoginState extends State<Login>, paste the following:
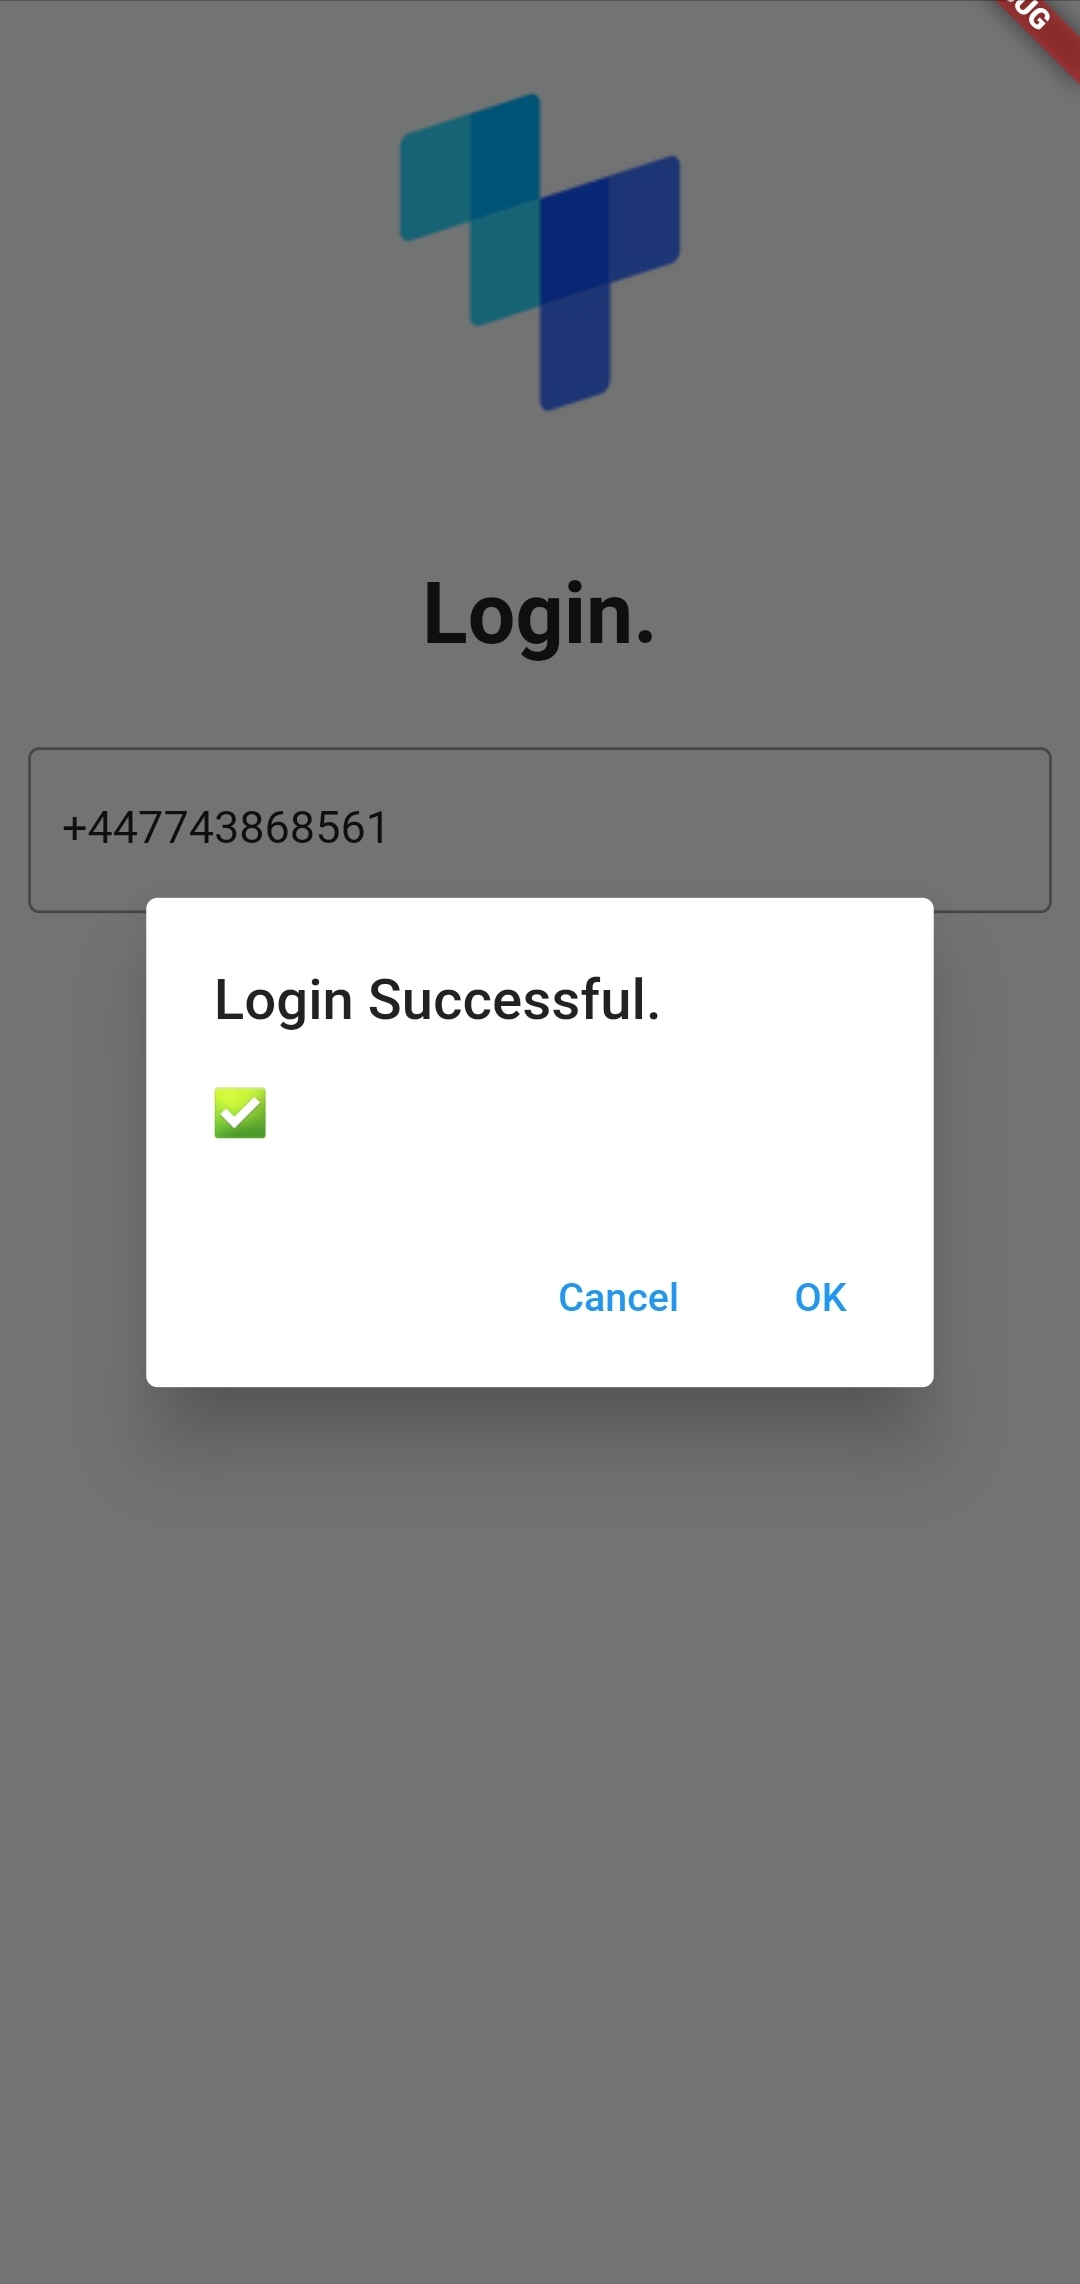
// Success scenario UIFuture<void> successHandler(BuildContext context) {return showDialog(context: context,builder: (BuildContext context) {return AlertDialog(title: const Text('Login Successful.'),content: const Text('✅'),actions: <Widget>[TextButton(onPressed: () => Navigator.pop(context, 'Cancel'),child: const Text('Cancel'),),TextButton(onPressed: () => Navigator.pop(context, 'OK'),child: const Text('OK'),),],);});}
Authenticating with Firebase Phone Auth
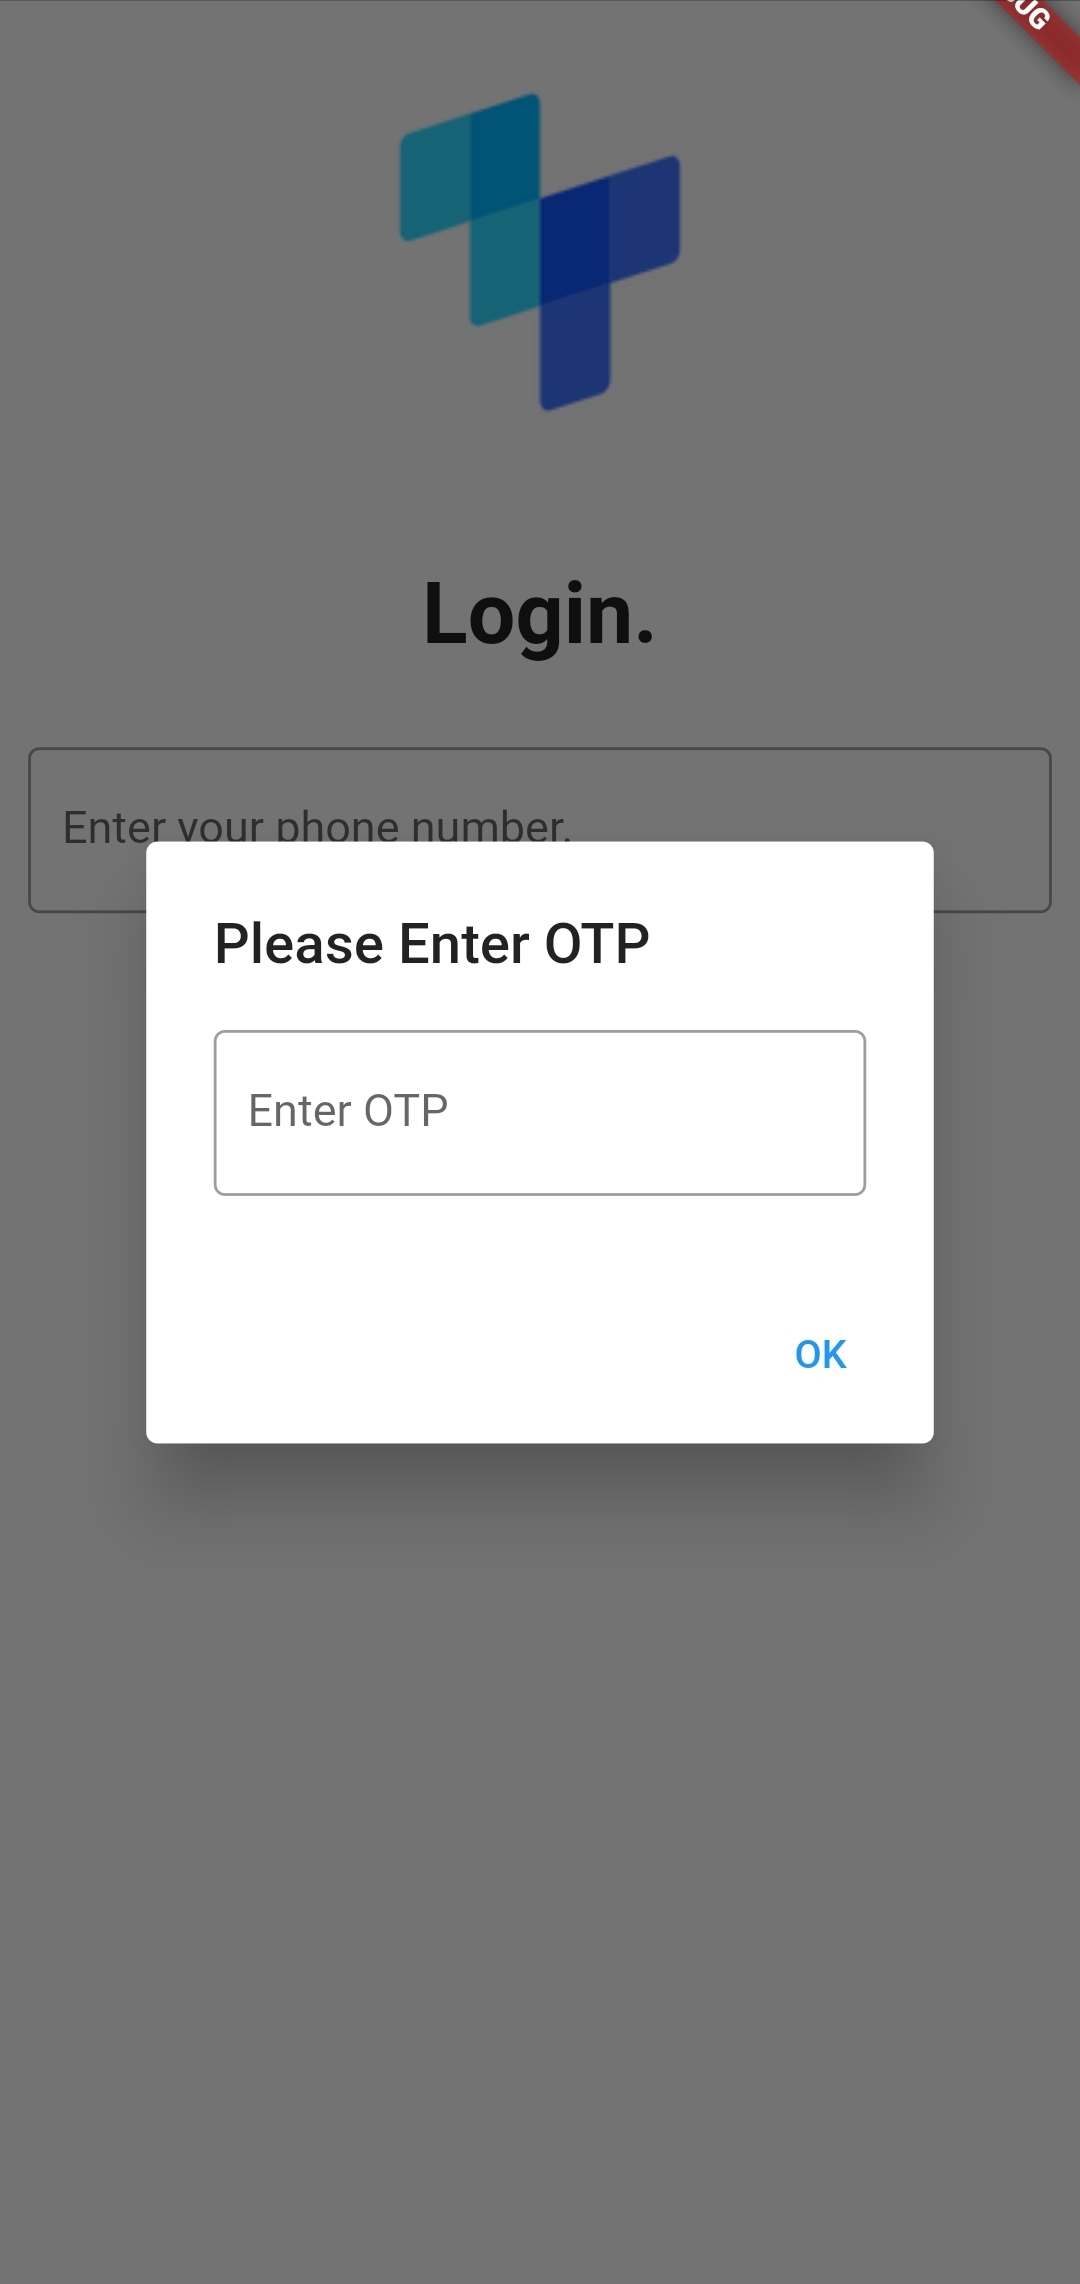
When the user clicks the TextButton, it needs to trigger a verification request with Firebase. This check verifies the user's phone number and sends them an SMS OTP which is auto-read on specific Android devices or otherwise typically handled via TextField.
To handle this second scenario, you'll create a reusable function that opens a dialog prompting the user to input their number and attempts to log the user in with Firebase once the dialog box has closed.
At the top of your lib/login.dart file, add the following import, which contains a helper class for handling errors:
import 'package:flutterfire/helpers.dart';
Find class LoginState extends State<Login>, and below void dispose() {}, add the following:
// OTP Screen handlerFuture<void> otpHandler(BuildContext context, FirebaseAuth auth, String verificationId) {return showDialog(context: context,builder: (BuildContext context) {return AlertDialog(title: const Text("Please Enter OTP"),content: TextField(keyboardType: TextInputType.phone,controller: otp,decoration: const InputDecoration(border: OutlineInputBorder(),hintText: 'Enter OTP',),),actions: <Widget>[TextButton(onPressed: () async {// create a PhoneAuthCredential with the otpPhoneAuthCredential credential = PhoneAuthProvider.credential(verificationId: verificationId, smsCode: otp.text);try {// sign in the userawait auth.signInWithCredential(credential);setState(() {loading = false;});} catch (e) {print(e);setState(() {loading = false;});return errorHandler(context, "Unable to sign you in.","Unable to sign you in at this moment. Please try again");}successHandler(context);return Navigator.pop(context, 'OK');},child: const Text('OK'),),],);});}
Next, you will be using Firebase, but first, the firebase_auth library needs importing. At the top of lib/login.dart, add the following import:
import 'package:firebase_auth/firebase_auth.dart';
Now, within the same file, find the line onPressed: () async {}, and replace it with the following:
onPressed: () async {// create a Firebase Auth instanceFirebaseAuth auth = FirebaseAuth.instance;await auth.verifyPhoneNumber(phoneNumber: phoneNumber.text!,timeout: const Duration(seconds: 120),verificationCompleted:(PhoneAuthCredential credential) async {// Android only method that auto-signs in on Android devices that support itawait auth.signInWithCredential(credential);setState(() {loading = false;});return successHandler(context);},verificationFailed: (FirebaseAuthException e) {setState(() {loading = false;});errorHandler(context, 'Something went wrong.','Unable to verify your phone number');return;},codeSent:(String verificationId, int? resendToken) async {// save resendToken to statesetState(() {resendingToken = resendToken;});print("your resend token is: ");print(resendToken);// render OTP dialog UIotpHandler(context, auth, verificationId);},codeAutoRetrievalTimeout: (String verificationId) {},);},
Here, you create a new Firebase instance and call the verifyPhoneNumber method. Android devices that support automatic SMS OTP resolution read the OTP and call the verificationCompleted callback attempting to sign the user in.
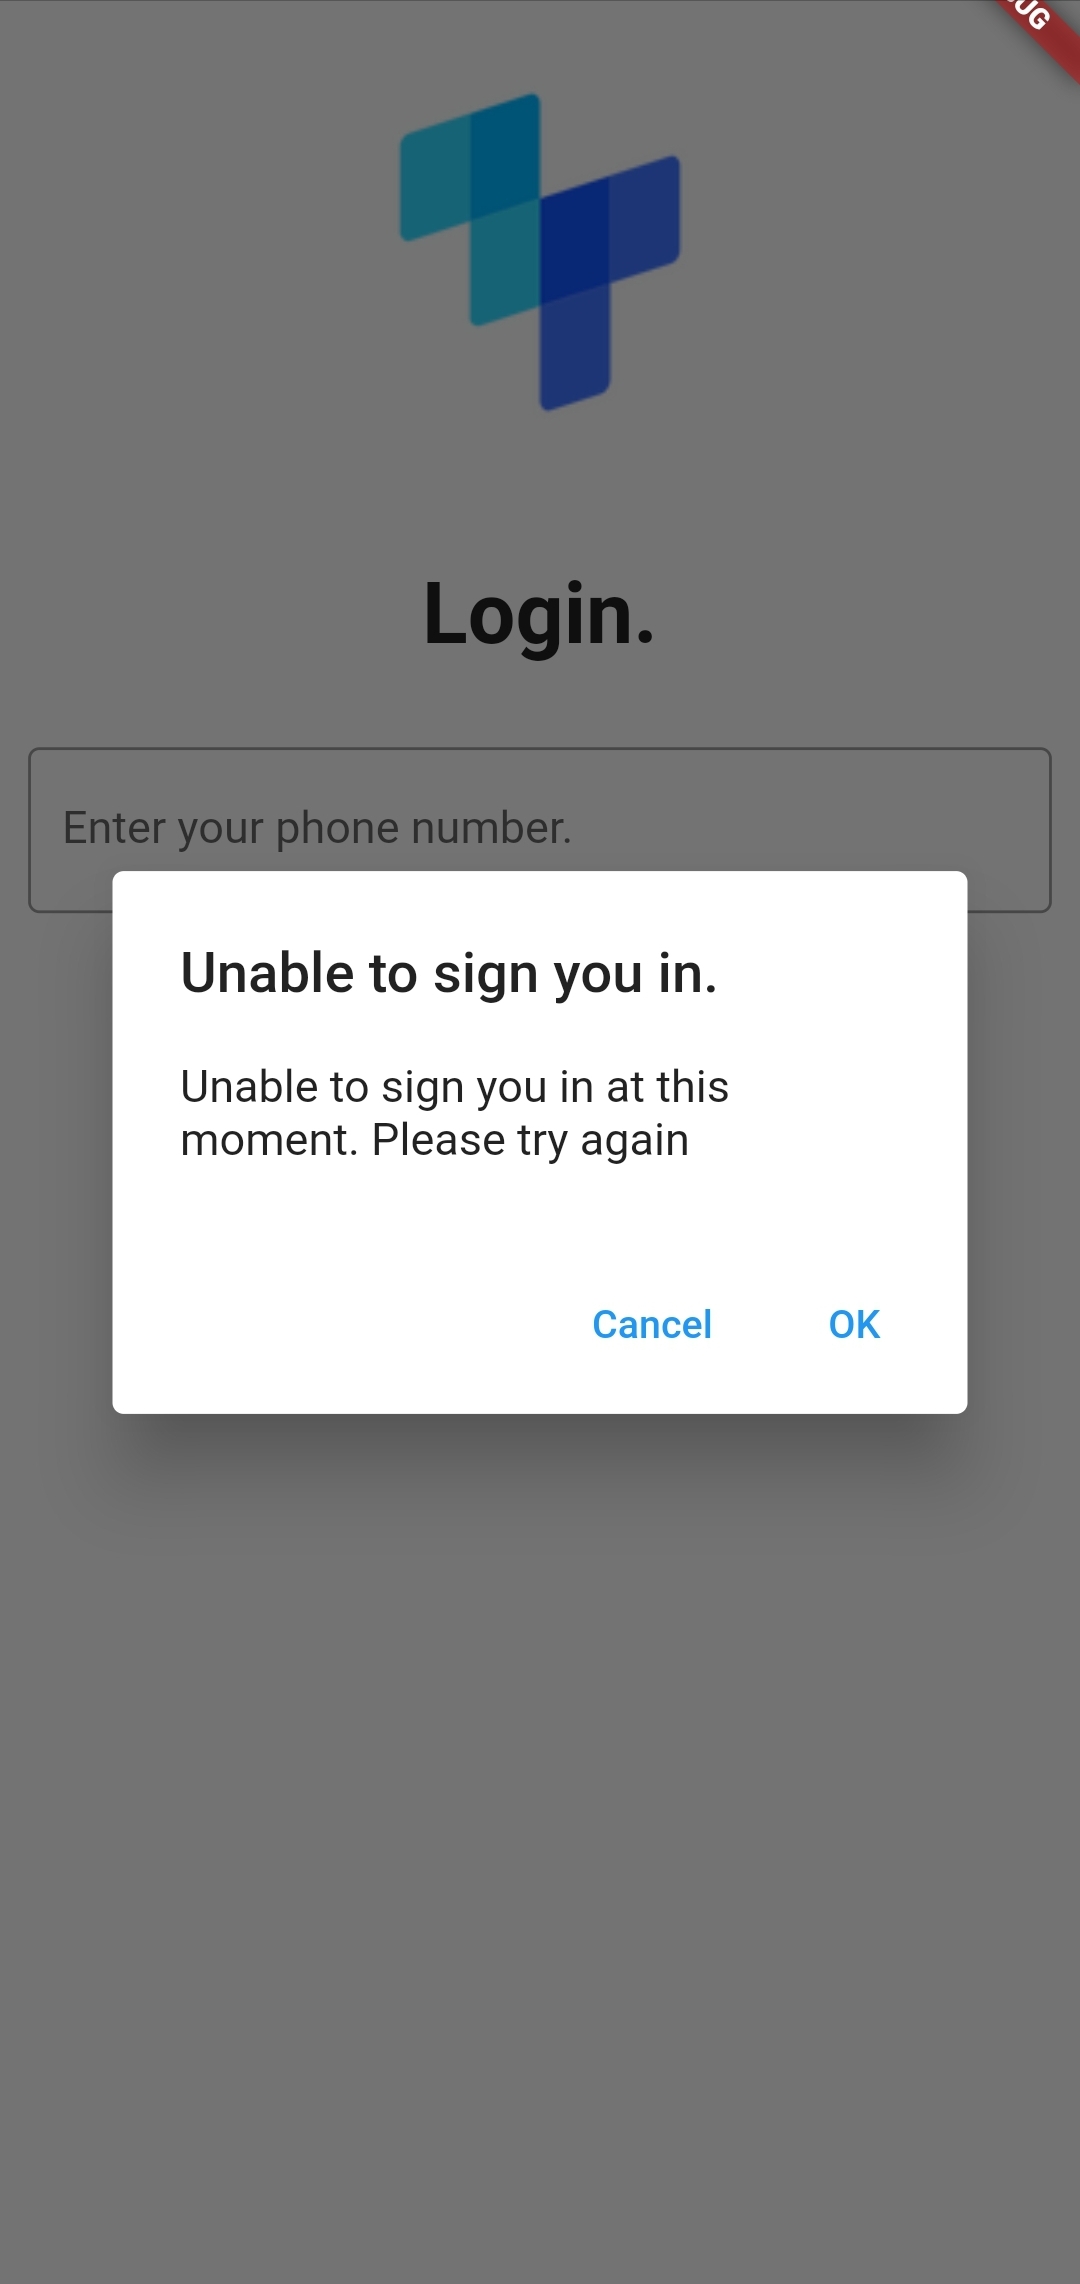
The verificationFailed callback is triggered to handle failure events such as invalid phone numbers or whether you've exceeded the SMS quota. In this callback, you set loading to false and render an error via our reusable error handler defined in lib/helpers.dart.
The next callback, codeSent, handles instances when Firebase has sent the SMS OTP to the user’s device. Here you save the resendToken to state as Firebase uses this value to force the resending of OTPs. The OTP handler function is then triggered, which logs the user in with Firebase.
The UI for the OTP screen and the UI for an unsuccessful attempt will look as follows:
Adding SIM swap detection
Now it's time to add SIM swap detection using the tru.ID SIMCheck API.
The SIM swap detection will happen before the Firebase Authentication, adding the first check before Firebase Phone Auth can happen. Once SIM swap detection has passed, Firebase Phone Auth will continue.
Before creating the SIMCheck, though, the application needs to call the Reachability API to check the user's mobile network operator supports the SIMCheck API. To do this, you'll need to install the tru.ID Flutter SDK. To install this SDK in your terminal, run the following command:
flutter pub add tru_sdk_flutter#ordart pub add tru_sdk_flutter
Add the imports for the tru.ID SDK, and a library that allows you to convert a string to JSON to the top of lib/login.dart:
import 'package:tru_sdk_flutter/tru_sdk_flutter.dart';import 'dart:convert';
Update the onPressed handler to the following:
onPressed: () async {setState(() {loading = true;});TruSdkFlutter sdk = TruSdkFlutter();bool isSIMCheckSupported = false;Map<Object?, Object?> reach = await sdk.openWithDataCellular("https://eu.api.tru.id/public/coverage/v0.1/device_ip",false);print("isReachable = $reach");if (reach.containsKey("http_status") &&reach["http_status"] != 200) {if (reach["http_status"] == 400 ||reach["http_status"] == 412) {return errorHandler(context, "Something Went Wrong.","Mobile Operator not supported, or not a Mobile IP.");}} else if (reach.containsKey("http_status") ||reach["http_status"] == 200) {Map body = reach["response_body"] as Map<dynamic, dynamic>;Coverage coverage = Coverage.fromJson(body);for (var product in coverage.products!) {if (product.name == "Sim Check") {isSIMCheckSupported = true;}}} else {isSIMCheckSupported = true;}if (isSIMCheckSupported) {// create a Firebase Auth instanceFirebaseAuth auth = FirebaseAuth.instance;await auth.verifyPhoneNumber(phoneNumber: phoneNumber.text,timeout: const Duration(seconds: 120),verificationCompleted:(PhoneAuthCredential credential) async {// Android only method that auto-signs in on Android devices that support itawait auth.signInWithCredential(credential);setState(() {loading = false;});return successHandler(context);},verificationFailed: (FirebaseAuthException e) {setState(() {loading = false;});errorHandler(context, 'Something went wrong.','Unable to verify your phone number');return;},codeSent:(String verificationId, int? resendToken) async {// save resendToken to statesetState(() {resendingToken = resendToken;});print("your resend token is: ");print(resendToken);// render OTP dialog UIotpHandler(context, auth, verificationId);},codeAutoRetrievalTimeout: (String verificationId) {},);} else {// SIMCheck is not supported by MNO. Do not bother creating SIMCheck proceed with Firebase Auth.// create a Firebase Auth instanceFirebaseAuth auth = FirebaseAuth.instance;await auth.verifyPhoneNumber(phoneNumber: phoneNumber.text,timeout: const Duration(seconds: 120),verificationCompleted:(PhoneAuthCredential credential) async {// Android only method that auto-signs in on Android devices that support itawait auth.signInWithCredential(credential);setState(() {loading = false;});return successHandler(context);},verificationFailed: (FirebaseAuthException e) {setState(() {loading = false;});errorHandler(context, 'Something went wrong.','Unable to verify your phone number');return;},codeSent:(String verificationId, int? resendToken) async {// save resendToken to statesetState(() {resendingToken = resendToken;});print("your resend token is: ");print(resendToken);// render OTP dialog UIotpHandler(context, auth, verificationId);},codeAutoRetrievalTimeout: (String verificationId) {},);}},
In the code above, the isReachable function gets called, which returns the networkId, networkName, countryCode, and products when checking whether the device is reachable through a cellular connection. The products array is an optional array of tru.ID's products are supported by the user's mobile network operator (MNO). There is also an error object that may contain potential errors.
The application then creates the variable isSIMCheckSupported, defaulting it to false. If the error status is not 400 (Unsupported by MNO) or 412 (Not a cellular IP address), the application loops through the products and checks whether the productName equals Sim Check. If it does, the value of isSIMCheckSupported is set to true.
If the isSIMCheckSupported variable gets set to false by the end of the loop, it means SIMCheck is not supported, and as such, it proceeds with Firebase Auth. If isSIMCheckSupported is true, the flow will be to create the SIMCheck and proceed with Firebase Auth.
Currently, the application proceeds with Firebase Auth, so it is time to implement the SIMCheck functionality.
Create the SIMCheck
The next step is to create the SimCheck resource. A data class is needed to represent the expected properties and convert the JSON response to a Dart Map.
Create a new file, models.dart, in the lib directory, and enter the following:
class SimCheck {bool noSimChange = true;SimCheck({required this.noSimChange});factory SimCheck.fromJson(Map<dynamic, dynamic> json) {return SimCheck(noSimChange: json['no_sim_change'] ?? true,);}}
The above code snippet creates a SimCheck class with a noSimChange boolean, representing the no_sim_change value retrieved from the SIMCheck API response.
A factory constructor is then created, initializing final variables from the JSON object passed in.
Lastly, a function is created that takes in a JSON string and passes the decoded JSON object to the factory constructor.
Back in the lib/login.dart file, import the newly created models.dart file at the top:
import 'package:flutterfire/models.dart';
The next step is to create a function for creating the SimCheck resource. We need to bring in a package to help make HTTP network requests.
In the terminal, run the following:
flutter pub add http#ordart pub add http
Import the new library at the top of lib/login.dart:
import 'package:http/http.dart' as http;
Locate the line class _LoginState extends State<Login> and above this, add the new createSIMCheck function shown below:
Future<SimCheck?> createSIMCheck(String phoneNumber) async {final response = await http.post(Uri.parse('$baseURL/sim-check'),body: {"phone_number": phoneNumber});if (response.statusCode != 200) {return null;}SimCheck simCheck = SimCheck.fromJson(jsonDecode(response.body));return simCheck;}
The final step is to call this function. Inside the top of the if (isSIMCheckSupported) {} block, add the following:
if (isSIMCheckSupported) {// SIMCheck is supported; create SIMCheckSimCheck? simCheckResult =await createSIMCheck(phoneNumber.text);if (simCheckResult == null) {setState(() {loading = false;});return errorHandler(context, 'Something went wrong.','Phone number not supported');}if (simCheckResult.noSimChange == false) {setState(() {loading = false;phoneNumberValue = phoneNumber.text;});phoneNumber.clear();return errorHandler(context, 'Something went wrong','SIM changed too recently.');}//The SIM hasn't changed in 7 days; proceed with Firebase Auth...}
Here, the application calls the function, and if simCheckResult is null, it returns the errorHandler. A check is then made to see if noSimChange is true. If it is, the state is updated and returned in the errorHandler. If this happens, the user's SIM has changed recently.
If simChanged is not true, the phone number has not changed in the past seven days, so the flow proceeds with Firebase Phone Auth.
Note Make sure to set
forceResendingTokenprop to theresendingTokenstate value on theverifyPhoneNumberfunction to force Firebase to resend the OTP.
The workflow from start to finish for a successful workflow is:
Wrapping up
There you have it: you’ve successfully integrated tru.ID SIMCheck with your Flutter applications secured with Firebase Phone Authentication, and now you have SIM swap detection for a more secure login flow.

