
Workspaces
tru.ID workspaces are containers for users accounts and billing accounts. There are two different kinds of workspaces you can belong to and these are:
- If you signed up to tru.ID on your own, you will have a workspace created for you, which, by default, you are the owner of — i.e. you'll have full control of the projects and billing for this workspace.
- If you signed up to tru.ID through an invitation from another tru.ID user, you will by default join their workspace with the access level that they have granted you — this could either be an admin or viewer. In addition, you will also have a separate workspace that you are the owner of.
You cannot create additional workspaces, but there is no limit to the number of workspaces you can be a member of.
Workspace credentials are generated as a client ID and client secret pair. These credentials allow you to access your workspace management API, for example creating Projects. These credentials do not allow you to make product API calls. You don't really need to generate these credentials if you have already had a project created and are looking to generate an access token to authenticate with when consuming the API.
Roles
There are three types of roles users could have in a workspace. These roles are as listed below:
- Owner: There can only be one Owner for a workspace, and this owner has full access to the workspace, they can invite new users, create and delete projects, add billing methods and top up their balance.
- Admin: Have the same privileges as Owners over all aspects of a workspace except billing. You should consider granting Admin privileges to other users who may be writing code or using the product APIs within your organisation. There are no limits on how many admins you can invite to your workspace.
- Viewers: Will not be able to create new projects. They can create and delete their own credentials and use them to view information relating to any project in your workspace. This role is useful for users who may want an administrative/reporting overview of the usage. There are no limits on how many viewers you can invite to your workspace.
Product API calls made by members of a workspace will consume balance from your stored value account (i.e. any top-ups or API balance credits you have are consumable by members of your workspace.)
There are no constraints imposed restricting which users can share a workspace, for example users from any domain can share the same workspace.
Billing
Billing related actions can only be performed by the sole owner of the workspace.
The sequence of actions for billing is as follows:
- First, the owner needs to add their company details.
- Second, the owner needs to add the payment details.
- Finally, the owner can use this added information to top up the account.
The default platform currency is API, which will change to the currency of your choosing when topping up for the first time. Please note, you will lose any unused API balance when you top up and change currency. The currency cannot be changed after the first top up, meaning any further payment methods will need to support this currency.
Projects
A tru.ID project is a method for applications to access tru.ID's APIs. A project serves two purposes:
- To provide credentials. Each user within the workspace will need to generate their own credentials, which will also remove the need to share credentials for a project.
- To logically group API calls. Having separate projects for specific purposes or applications increases security and improves tracking over the usage of each project.
Users have the ability to generate up to two pairs of credentials per project. Project credentials need to be used to generate authentication tokens, they cannot directly be used for making product API calls.
With the ability to create new credentials, there is also functionality to delete your credentials. This is added because we promote good security practice such as cycling credentials regularly.
Project Modes
There are two different modes a project can belong to:
- Live: Real world checks are made via the API, with real requests being made to mobile network operator's (MNOs) systems. This mode consumes API balance whenever an API call is accepted by the platform.
- Sandbox: The Sandbox contains the full features that the Live mode provides, but the checks made aren't sent to the MNO's systems, these checks also don't consume API balance as the purpose of the Sandbox is to help you integrate the API and for you to build automated tests against.
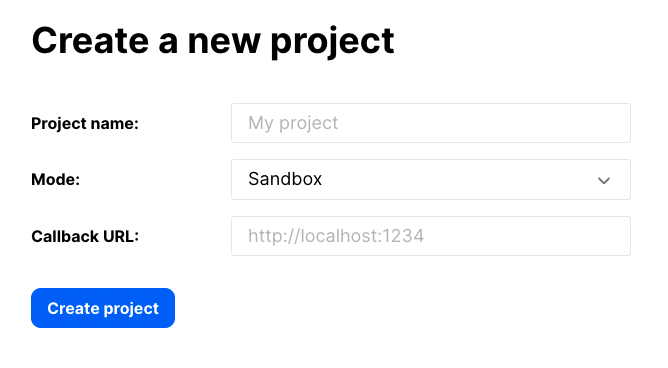
Project Configuration
When creating or updating a project, there is also an optional section for the Product Configuration. Within this section there are four expandable configurations, with the labels:
- PhoneCheck,
- SubscriberCheck,
- Authenticator,
- OIDC.
Although these are not required, even if you use the specific Product, the option is still there for you to configure yourself. For example, within the PhoneCheck and SubscriberCheck configurations are fields for a Callback URL and a Redirect URL. The Callback URL is a URL defined by you to receive Asynchronous Callback Notifications, whenever a PhoneCheck or SubscriberCheck has a status update to either: COMPLETED, EXPIRED, or ERROR.
The Redirect URL is an option for the check_url when creating a Check, to end up redirecting to your defined URL. This is not necessarily important unless you're implementing a mobile web application.
For the optional configuration of Authenticator or OIDC, unless you're implementing the Check functionality using these technologies, you'll not need to update any of the fields within these two sections.
Sandbox Mode
tru.ID Projects can be set to a mode of sandbox where API requests do not result in interactions with MNOs (Mobile Network Operators) and no costs are incurred. In Sandbox mode API requests and workflows follow a set of deterministic rules that can be used to facilitate development and testing.
How to Create a Project in Sandbox Mode
A project can be created using the API. See Create a Project in the API Reference.
To create a project in sandbox mode use the CLI with --mode sandbox:
tru projects:create "Project Name" --mode sandbox
How to Update a Project to Sandbox Mode
A project can be updated using the API. See Update a Project in the API Reference.
To update a project to sandbox mode using the tru.ID CLI, run the following command from within a directory with a tru.json configuration file:
tru projects:update --mode sandbox
If the tru.json is within another directory use the --project-dir flag:
tru projects:update --mode sandbox --project-dir /path/to/dir/with/config/file
Sandbox Rules
Outlined below are the products and associated rules when a project has a mode set to sandbox.
PhoneCheck
Sandbox rules are applied based on the phone_number value used when creating a PhoneCheck resource. Once the Check URL has been requested the resource will transition to have status and match values determined by the following rules:
phone_number Suffix | match | status |
|---|---|---|
An even digit: (0, 2, 4 ...) | true | COMPLETED |
An odd digit: (1, 3, 5 ...) | false | COMPLETED |
Ends with: (00, 55, 99) | false | ERROR |
SIMCheck
Sandbox rules are applied based on the phone_number value used when creating a SIMCheck resource. The value of no_sim_change and status will be set based on the following logic:
phone_number Suffix | no_sim_change | status |
|---|---|---|
Ends with: (0, 1, 2, 3, 4) | true | COMPLETED |
Ends with: (5, 6, 7, 8, 9) | false | COMPLETED |
Ends with: (00, 55, 99) | N/A | ERROR |
SubscriberCheck
Sandbox rules are applied based on the phone_number value used when creating a SubscriberCheck resource. Once the Check URL has been requested the resource will transition to have status, match, and no_sim_change values determined by the following rules:
phone_number Suffix | match | no_sim_change | status |
|---|---|---|---|
Ends with: (0, 2, 4 ) | true | true | COMPLETED |
Ends with: (6, 8) | true | false | COMPLETED |
Ends with: (1, 3, 5, 7, 9) | false | N/A | COMPLETED |
Ends with: (00, 55, 99) | false | N/A | ERROR |
Device Reachability
Sandbox rules are applied based on the ip (IP Address) value used when querying the reachability of a device. The responses to the HTTP GET request will be as follows:
| IP Address Suffix | Result Meaning | HTTP Status Code | Payload |
|---|---|---|---|
Even digit: (0, 2, 4 ...) | Success | 200 | JSON result |
Odd digit: (1, 3, 5 ...) | Not a Mobile IP Address | 412 | JSON HTTP Problem |
99 | MNO Not Supported | 400 | JSON HTTP Problem |
Example: IP Address Ending in an Even number
tru coverage:reach 127.0.0.2network_id network_name country_code supported_products00000 Sandbox MNO ZZ Phone Check,Sim Check,Subscriber Check
Example: IP Address Ending in an Odd number
tru coverage:reach 127.0.0.1API Error: Error: Request failed with status code 412 {"type": "https://developer.tru.id/docs/reference/api-errors#not_mobile_ip","title": "Precondition Failed","status": 412,"detail": "Not a mobile IP"}› Error: failed to retrieve reach: EEXIT: 1
Example: IP Address Ending in 99
tru coverage:reach 127.0.0.99API Error: Error: Request failed with status code 400 {"type": "https://developer.tru.id/docs/reference/api-errors#mno_not_supported","title": "Bad Request","status": 400,"detail": "MNO not supported"}› Error: failed to retrieve reach: EEXIT: 1
Authentication
tru.ID uses three methods of authentication. Basic Authentication with a client_id and a client_secret is used for managing access tokens. Bearer (Token) Authentication is used to authenticate all other APIs. Signed HTTP Message authentication is used with HTTP callbacks and webhooks made from the tru.ID platform to your application servers to enable you to verify the request origin.
All API requests must be made over HTTPS and API calls made over HTTP will fail.
This guide covers:
- Basic Authentication: when managing OAuth2 Access Tokens
- Bearer (Token) Authentication: with all product API
- Signed HTTP Messages: for callback and webhook signing
Basic Authentication
In the request the Authentication HTTP header value should be composed of Basic plus a Base64 value generated by concatenating a client_id, a colon (":") and a client_secret.
Authorization: Basic Base64Encode(concat({client_id}, ':', {client_secret}))
client_id and client_secret credentials are associated with either a Workspace (a container for usage and billing for one or more projects) or a Project (a container for configuration related to the usage of one or more products).
Workspace credentials are created upon creation of your tru.ID account and your default workspace (a workspace that is automatically created for you). They can be retrieved from the tru.ID Console. The client_secret is only stored in browser localStorage and will be lost if you logout of the Console. You should store the client_secret securely. If required, you can reset your Workspace client_secret from the Console.
Project credentials are created upon creation of a new Project. Again, tru.ID does not store the client_secret so you should make sure you store it securely. You cannot reset your Project client_secret. Therefore, if you lose a Project client_secret you should create a new Project and associated credentials.
Basic client_id and client_secret authentication is used with:
Using Basic Authentication
The following example shows using Basic Authentication via a Base64 encoded header to create an access token.
Example
curl -H "Authorization: Basic Base64({client_id}:{client_secret})" \-X POST -F 'grant_type=client_credentials' \-F 'scope=phone_check' \https://{data_residency}.api.tru.id/oauth2/v1/token
Basic client_id and client_secret authentication is used with:
Bearer (Token) Authentication
The tru.ID APIs expect the bearer token to be a OAuth2 Access Token. The access token should be within the Authorization HTTP header, prefixed with Bearer .
Authorization: Bearer {access_token}
An access token is created using a client_id and client_secret and the OAuth2 /token endpoint.
Access tokens are used with:
Creating Access Tokens
When creating an access token a grant_type of client_credentials should be used along with a scope. The scope defines the resources the access token enables access to. An access token can have multiple scopes by supplying scopes separated by a space within the scope parameter.
The scopes and associated resources are:
projects:/console/{version}/projects*workspaces:/console/{version}/workspaces/*phone_check:/phone_check/{version}/*
Examples
Create an access token with a scope of phone_check to access /phone_check/* resources.
curl -H "Authorization: Basic Base64({client_id}:{client_secret})" \-X POST -F 'grant_type=client_credentials' \-F 'scope=phone_check' \https://{data_residency}.api.tru.id/oauth2/v1/token
Create an access token with a scope of projects and phone_check to access /console/{version}/projects* and /phone_check/{version}/* resources.
curl -H "Authorization: Basic Base64({client_id}:{client_secret})" \-X POST -F 'grant_type=client_credentials' \-F 'scope=projects phone_check' \https://{data_residency}.api.tru.id/oauth2/v1/token
Using Access Tokens
The following example shows using access token authentication with to create a PhoneCheck.
Example
curl -X POST \-H 'Authorization: Bearer IdyB_OyXbxf8-nsLfJtIYXvM5kY9-rjAejX8IvUisOo.H7McspB--9lRA5hdzzEM5GcsS0D87nTtvP6oGQtHFNI' \-H 'Content-Type: application/json' \-d '{"phone_number": "447700900000"}''https://{data_residency}.api.tru.id/phone_check/v0.1/checks'
Access tokens are used with:
Signed HTTP Messages for Callback and Redirect URLs
Callback and redirect URL requests are signed according to the http message signing RFC.
You verify if a request has been sent by the tru.ID platform, and hasn't been tampered with, by validating a signature received in the request.
The signature verification process is as follows:
Signature Payload + Signature + Signing Key -> Verify Signature -> Valid | Invalid
- Signature Payload - The payload used to create the signature. According to the RFC, it can be a combination of several parts of the request. For example, headers, request path, etc.
- Signature - The result of signing the payload with the private part of the tru.ID signing key.
- Signing Key - The public part of the key tru.ID used to sign the request.
Verifying the Signature
Public Signing Key
In order to verify a request signature you need to access the tru.ID public signing keys. They are exposed via an endpoint as a JSON Web Key Set (JWKS):
https://{data-residency}.api.tru.id/.well-known/jwks.json
This way, you always have access to the most recent set of signing keys. The JWKS is structured as follows:
{"keys": [{"kty": "RSA","e": "AQAB","use": "sig","kid": "c05a90fb91000fe6b1b3b988127ac3d8756101ca","alg": "RS256","n": "ALyUy3g7f4Rt4-OxGOildEOj_FW5wjT7l0ZoumqbiCyWCsW5XC2J4QadAkcFaSFOGGwJCW_lGi-y8sCx67y5vG6t3l6pRQOxtZ7_4wZ69A4347fKe4vSekzQyZVBcBHEH12Ea2P5Juu_OQpVJoTcvdF6e1oyQXubJ70xNCkYdYvkUoMy8VViQpXZuKttP_z6gc6tck04sJKXqQG8WRPur2wpIu_jcfdUDOe9RRFiq_P90E9YnsweiszsHz2gthDbhDY9kZz-U4o8yLdwRPqBcJOp6ye6V5-9uZz9rFNMitHDuNOd_vtJCdaccJGQ0Re2lQplRWYtVOEDHmfCzmDigss="}]}
There can be multiple keys inside the keys attribute. It is important to note the following attributes in a key:
kid- the key's unique identifier. One of these will match thekeyIdof the signature metadata recieved in the inbound request.alg- the key's algorithm used to sign or verify requests. In this example it is RSA 256.
You should convert the JSON Web Key (JWK) into a PEM format, which should then be used to verify digital signatures. There are many libraries available that support this conversion.
Callback Signature and Signature Payload
As per the RFC, the signature and corresponding metadata are in the Authorization header of the callback request.
Here's an example of a signed PhoneCheck callback:
POST / HTTP/1.1Host: enpcxr60rbv5h.x.pipedream.netAuthorization: Signature keyId="c05a90fb91000fe6b1b3b988127ac3d8756101ca",algorithm="rsa-sha256",headers="(request-target) host date x-tru-callback digest",signature="PSNUgy/M7S2r62O6agIVvgopFyqLZv5UwpDu6ZBIqE2Me6kMy3vb8o+w8wVt+yVrLs8ZfJVL7LNnr5PcfNTxMvrfOp1pLuigvya42KCnN18RmfFubP54wQOnYb7j2UqS8CzJheSVzow8rOMqzZSMcXMUFvj1KQXETuRB0fJENw9RCvWMi59jg8TUD3S9jEWV0uw7d21j53+fdnaC7bIBF038A4NncLenbdTXSQX8R72CD4UAqA5/r/9VISoue/a2T3gC0MOueUOLC8AjLH864BV/2cDvyXz/9oTcm0SJ2CRaKdLaiolDx4LhaMGE4bC8xOSYXs2sGJwlsGJOIFCGGQ=="Content-Type: application/jsonDate: Fri, 18 Sep 2020 14:52:03 GMTDigest: SHA-256=36206190f57d5a7dc5d8e2b9fa57f21ce0ecfd31f45eaaf200de2d5d6bffbc60x-tru-callback: phone_checkContent-Length: 169{"check_id":"c2b0ac55-9184-4bbe-9ce9-2147fcd9e63e","status":"COMPLETED","match":true,"charge_amount":1.0,"charge_currency":"API","created_at":"2020-09-18T14:51:54+0000"}
The signature metadata of this request, extracted from the Authorization header:
Signature keyId="c05a90fb91000fe6b1b3b988127ac3d8756101ca",algorithm="rsa-sha256",headers="(request-target) host date x-tru-callback digest",signature="PSNUgy/M7S2r62O6agIVvgopFyqLZv5UwpDu6ZBIqE2Me6kMy3vb8o+w8wVt+yVrLs8ZfJVL7LNnr5PcfNTxMvrfOp1pLuigvya42KCnN18RmfFubP54wQOnYb7j2UqS8CzJheSVzow8rOMqzZSMcXMUFvj1KQXETuRB0fJENw9RCvWMi59jg8TUD3S9jEWV0uw7d21j53+fdnaC7bIBF038A4NncLenbdTXSQX8R72CD4UAqA5/r/9VISoue/a2T3gC0MOueUOLC8AjLH864BV/2cDvyXz/9oTcm0SJ2CRaKdLaiolDx4LhaMGE4bC8xOSYXs2sGJwlsGJOIFCGGQ=="
And the signature payload, extracted from the signature metadata field:
PSNUgy/M7S2r62O6agIVvgopFyqLZv5UwpDu6ZBIqE2Me6kMy3vb8o+w8wVt+yVrLs8ZfJVL7LNnr5PcfNTxMvrfOp1pLuigvya42KCnN18RmfFubP54wQOnYb7j2UqS8CzJheSVzow8rOMqzZSMcXMUFvj1KQXETuRB0fJENw9RCvWMi59jg8TUD3S9jEWV0uw7d21j53+fdnaC7bIBF038A4NncLenbdTXSQX8R72CD4UAqA5/r/9VISoue/a2T3gC0MOueUOLC8AjLH864BV/2cDvyXz/9oTcm0SJ2CRaKdLaiolDx4LhaMGE4bC8xOSYXs2sGJwlsGJOIFCGGQ==
In order to verify the signature, you first reconstruct the signature payload. The headers metadata field
describes what the payload should look like. In our example it will have the following values:
(request-target)- the request method and the path and query of the effective request URI (examples)host- the value ofHostheaderdate- the value ofDateheaderx-tru-callback- the value ofx-tru-callbackheaderdigest- the value ofDigestheader. The value is the body contents hashed with the algoritm identified in theSignatureheader byalgorithm={algoritm_value}and then Base64 encoded. For example,digest: SHA-256=hex(SHA256(Body)).
The reconstructed payload will look like this (the newlines are important):
(request-target): post /host: enpcxr60rbv5h.x.pipedream.netdate: Fri, 18 Sep 2020 14:52:03 GMTx-tru-callback: phone_checkdigest: SHA-256=36206190f57d5a7dc5d8e2b9fa57f21ce0ecfd31f45eaaf200de2d5d6bffbc60
The next step is identifying the key used to sign the request. The keyId metadata value should match a kid in the JWKS.
The final step is identifying the algorithm used to sign the request. The algorithm metadata value tells us it was rsa-sha256 so we can now fully verify the signature.
Example
The following Node.js example show how to handle the PhoneCheck callback, retrieve the tru.ID JWKS, parse the HTTP signature and verify that HTTP messages was signed, and thus the request made, by tru.
const express = require('express')const app = express()const bodyParser = require('body-parser')const util = require('util')app.use(bodyParser.json())const jwksClient = require('jwks-rsa')const getSigningKey = util.promisify(keyClient.getSigningKey)const httpSignature = require('http-signature')const keyClient = jwksClient({jwksUri: `${API_BASE_URL}/.well-known/jwks.json`,})app.post('/callback', async (req, res) => {console.log('received callback', req.headers, req.body)const parsed = httpSignature.parseRequest(req)const keyId = parsed.keyIdconst jwk = await getSigningKey(keyId)const verified = httpSignature.verifySignature(parsed, jwk.getPublicKey())if (!verified) {res.sendStatus(400)return}res.sendStatus(200)})app.listen(3000)
The libraries used in the above example are:
- HTTP Message Signing: node-http-signature
- JWKS: node-jwks-rsa
HTTP message signing and JWKS libraries are available in other programming languages.
HTTP message signing is used with:
Redirect Signature and Signature Payload
As per the RFC, the signature and corresponding metadata are in the Authorization parameter of the redirect request.
Here's an example of a signed PhoneCheck redirect:
GET /?check_id=c2b0ac55-9184-4bbe-9ce9-2147fcd9e63e&code=5d9b32855e&authorization=PSNUgy/M7S2r62O6agIVvgopFyqLZv5UwpDu6ZBIqE2Me6kMy3vb8o+w8wVt+yVrLs8ZfJVL7LNnr5PcfNTxMvrfOp1pLuigvya42KCnN18RmfFubP54wQOnYb7j2UqS8CzJheSVzow8rOMqzZSMcXMUFvj1KQXETuRB0fJENw9RCvWMi59jg8TUD3S9jEWV0uw7d21j53+fdnaC7bIBF038A4NncLenbdTXSQX8R72CD4UAqA5/r/9VISoue/a2T3gC0MOueUOLC8AjLH864BV/2cDvyXz/9oTcm0SJ2CRaKdLaiolDx4LhaMGE4bC8xOSYXs2sGJwlsGJOIFCGGQ==&date=VGh1LCAxOSBNYXkgMjAyMiAxMTo0ODo0OCBHTVQ= HTTP/1.1Host: enpcxr60rbv5h.x.pipedream.netDate: Fri, 18 Sep 2020 14:52:03 GMT
The signature payload, extracted from the authorization parameter field:
PSNUgy/M7S2r62O6agIVvgopFyqLZv5UwpDu6ZBIqE2Me6kMy3vb8o+w8wVt+yVrLs8ZfJVL7LNnr5PcfNTxMvrfOp1pLuigvya42KCnN18RmfFubP54wQOnYb7j2UqS8CzJheSVzow8rOMqzZSMcXMUFvj1KQXETuRB0fJENw9RCvWMi59jg8TUD3S9jEWV0uw7d21j53+fdnaC7bIBF038A4NncLenbdTXSQX8R72CD4UAqA5/r/9VISoue/a2T3gC0MOueUOLC8AjLH864BV/2cDvyXz/9oTcm0SJ2CRaKdLaiolDx4LhaMGE4bC8xOSYXs2sGJwlsGJOIFCGGQ==
In order to verify the signature, you first reconstruct the signature payload. The headers metadata field
describes what the payload should look like. In our example it will have the following values:
(request-target)- the request method and the path and query of the effective request URI (examples)date- the base64 decoded value ofDateparameterhost- the value ofHostparameterauthorization- the base64 decoded value ofauthorizationparameter.
The reconstructed payload will look like this (the newlines are important):
(request-target): get /date: Fri, 18 Sep 2020 14:52:03 GMThost: enpcxr60rbv5h.x.pipedream.netauthorization: SHA-256=36206190f57d5a7dc5d8e2b9fa57f21ce0ecfd31f45eaaf200de2d5d6bffbc60
The next step is identifying the key used to sign the request. The keyId metadata value should match a kid in the JWKS.
The final step is identifying the algorithm used to sign the request. The algorithm metadata value tells us it was rsa-sha256 so we can now fully verify the signature.
Example
The following Node.js example show how to handle the PhoneCheck callback, retrieve the tru.ID JWKS, parse the HTTP signature and verify that HTTP messages was signed, and thus the request made, by tru.
const express = require("express")const app = express()const bodyParser = require("body-parser")app.use(bodyParser.json())const jwksClient = require("jwks-rsa")const httpSignature = require("http-signature")const keyClient = jwksClient({jwksUri: `${API_BASE_URL}/.well-known/jwks.json`,})app.get('/redirect', async (req, res) => {console.log('received redirect', req.headers, req.query)try {const url = new URL(req.protocol + '://' + req.get('host') + req.originalUrl);const signature = Buffer.from(url.searchParams.get("authorization"),"base64").toString("utf-8");const date = Buffer.from(url.searchParams.get("date"), "base64").toString("utf-8");url.searchParams.delete("authorization");url.searchParams.delete("date");const originalRequest = {url: `${url.pathname}${url.search}`,method: "get",hostname: url.hostname,headers: {date,host: url.host,authorization: signature,},};const parsedOriginalRequest = httpSignature.parseRequest(originalRequest, {clockSkew: 5000,});const jwk = await keyClient.getSigningKey(parsedOriginalRequest.keyId);const verified = httpSignature.verifySignature(parsedOriginalRequest,jwk.getPublicKey());if (!verified) {res.sendStatus(400)return}res.sendStatus(200)} catch (err) {console.error(err);return false;}})app.listen(3000)
The libraries used in the above example are:
- HTTP Message Signing: node-http-signature
- JWKS: node-jwks-rsa
HTTP message signing and JWKS libraries are available in other programming languages.
HTTP message signing is used with:
Asynchronous Callback Notification
An asynchronous callback notification is a predefined public URL that will receive a POST request when a PhoneCheck or SubscriberCheck's status reaches one of the following:
COMPLETEDEXPIREDERROR
There are two ways to define an asynchronous callback notification:
- In your tru.ID Console You can define the
Callback URLfield when creating the 'Project'.
- Or when creating individual PhoneCheck and SubscriberCheck checks through the optional property
callback_url. Note that if you specify the optionalcallback_urlproperty on a product API call, the project configuration is overridden.
Requests to the asynchronous callback notification are signed following the http message signing RFC. The signature received in the request may be used by you to confirm the sender is indeed tru.ID, and the payload hasn't been tampered.
Asynchronous callback notifications are useful for being notified of the status of a request, as an alternative to having to query for the status with a check_id. You should ACK callbacks received by your server with a 2XX. If we receive any of: 2XX, 3XX, 4XX, or connection timeouts, we do not retry the callback. If we receive a 5XX we will retry for a maximum of 6 tries.
Please note that we do not persist EXPIRED or ERROR Checks, so you will not see requests that didn't end up as COMPLETED when querying or listing checks made (performing a GET on any product resource). If you would like to maintain a record of these, you must provide a callback_url and parse callbacks received by it.

